
Line Position
Piping Design
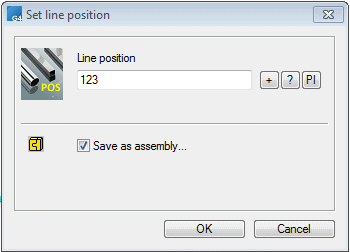
Set the Line Position
- Select a pipe or duct line from assembly or begin routing the line.
- Select
 tab > Tools group >
  Set Line Position.
Or
Select
tab > Positions group > Line position. - Set line position for the selected pipe component.
- Save the line position.
Note:
- You can search a position added to the project's PI Schema by selecting
 Select line position.
 - Set a position using automatic positioning by selecting
 Set line position.
Ask Active Line Position
When you begin routing a line by indicating the first point, the line position settings is determined as follows:
-
Define the line position in the field. This is available if you have selected
 Ask Line Position.
- The system does not ask for the line position, but, instead, uses the current line position.
This is available if you select
Automatic positioning in project, and you have entered the value of the line position.  Not in use in Flow connection.
Changing the Line Position when Creating a Line/Viewing Project Data
- When the creation of a line is incomplete, you can change the position.
- On the tab, in the Tools group, select Set Line Position to the added pipe components.OrSelect tab > Positions group > Line position.
- Define the line position in the field.
- Select either of the following:
- Select Automatic Positioning in Project.
- If you would like to be prompted for the line position every time you begin routing a line, select Ask Line Position.
- Select
- View the project data with the buttons.
 Line Position
 Pipes
Pipes
- Click OK.
Adding/Changing a Line Position - Selecting a Function First
- Select the context-sensitive function Piping Design> Set Line Position.
 Find Pipe Line is selected.
 - Select a part and the components of the same pipe line will be selected.
- Set line position.
- Click OK.
Note:
- If Find Pipe Line is selected, you can select parts and/or assemblies individually. Use the Alt key to select an assembly.
Save Line position as an Assembly
- Select one or more pipe, duct and/or cable ladder components from the assembly tree.
- Select the context-sensitive function Piping Design> Set Line Position.
- Change selected components as a new assembly by selecting Save as Assembly.
- Click OK.
- A New Document dialog box is opened and you can define data of a new document:
- New assembly is a link assembly (default).
- Enter a Code.
- Save to project To project.
- Create a local assembly Local.
- Click OK.