Nesting Profiles
General
- Nesting profiles means placing individual profiles of an assembly to be cut from the profile blanks in stock. In this context, the aim is always to minimize the waste that is inevitably left from the stock profile.
- You can now make a nesting plan for the profiles of your assembly, which takes into account the profiles in your stock and their lengths.
Steps
- Create a CSV file with the columns of the stock profile item code, length (in meters) and number on the shelf.
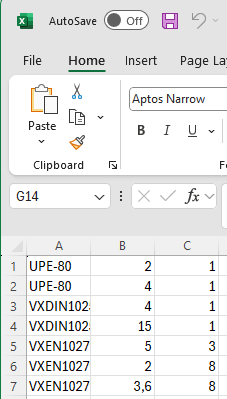
- After this, you can nest the profile assembly using the Nesting function on the ribbon.

- Read the stock list CSV using the Update function. After this, you can enter the unit precision, cutting blade width and multiple of the assemblies if you want the same assembly to be made in several pieces at once. The Apply button performs nesting for the profiles of the assembly.
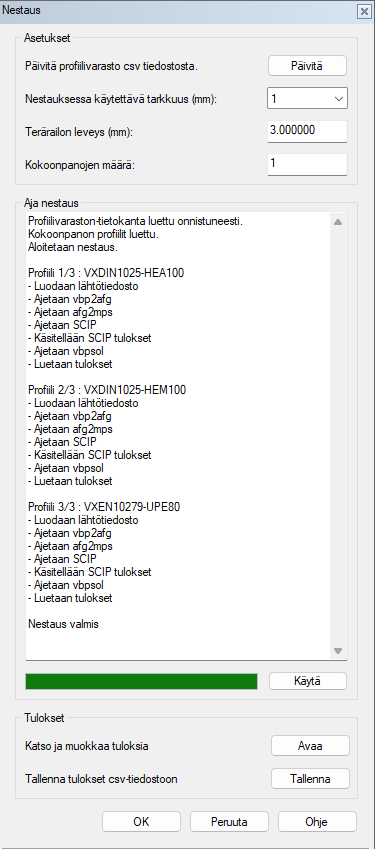
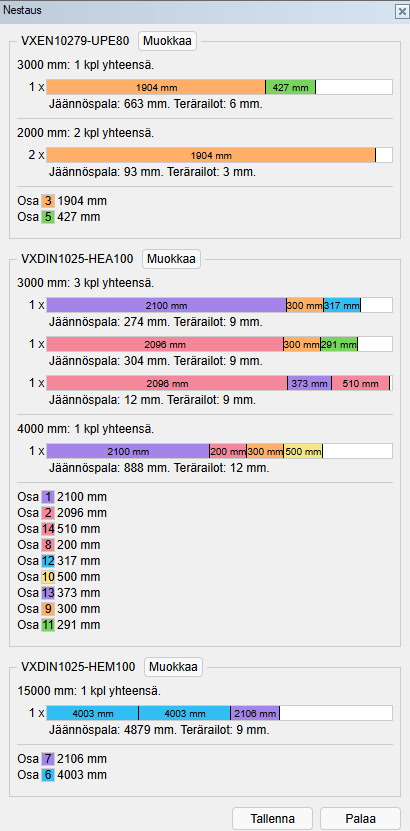
- By pressing the Open button in the Results block, you can view the results. The program displays the optimized result according to the waste. The Edit button allows you to manually move sections from one storage profile to another or change their order if necessary. The Save button opens a dialog where the user can preview the PDF document to be printed and make the necessary changes. The dialog then asks the user for the name of the PDF document to be printed and the location where it will be printed.
This diagram shows how the profiles should be cut to minimize waste.
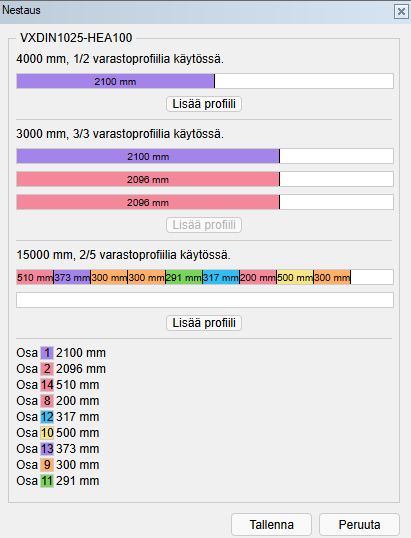
- The Edit mode for the VXDIN1025-HEA-100 profile is shown below. The user can add available storage profiles by pressing the Add profile button. The profiles of the profile assembly can be moved between storage profiles as desired, if the result produced by the nesting function is not as desired. By pressing the Save button, the changes made are transferred to the previous result describing the overall situation.