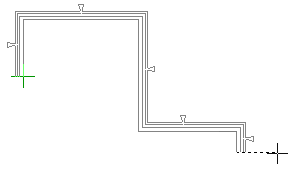
Add a Wall
Add a wall as follows:
- Activate the drawing window. You can also add a wall in the model, but clicking the points is easier in the drawing.
- Do either of the following:
- Select Modeling | Wall Layout |
 Wall.
Wall. - Right-click to open the context-sensitive menu, and select
 Insert
Wall.
- Select Modeling | Wall Layout |
- Select the wall in a dialog box.
- If necessary, change the locating height of the wall or the reference line, or select another auxiliary function.
- You can also select the wall's presentation method with an auxiliary function. The coarse/accurate presentation method is especially important when adding a log wall. By default, the presentation method of a log wall is coarse. Individual logs are modeled in the accurate presentation method, but this also increases the size of the model and slows down its handling.
- Begin adding the wall from the absolute origin, which has been marked in the 2D drawing
with a cross near the lower left corner of the drawing window
 .
. - Select the corner points of a wall group one by one. You can also select the
 Rectangular walls
auxiliary function, which allows you to select the start and end points of the diagonal of
the rectangular wall group. When you are adding exterior walls, select their corner points
by moving clockwise around the building. In this way, you can make sure that the outer face
of the wall will face outward and the inner face inward, ensuring that windows added later
are placed in the wall with the correct facing. When adding, an arrow will indicate the
outer face of the wall. The wall reference line will pass through the selected points.

You can select the locations of the corner points in several different ways.
When you are designing a parametric building model, click the corner points to their approximately correct locations, and position them accurately at a later time using geometric constraints.
- Do either of the following:
- When you are adding an open wall chain, select the Confirm function.
- When you are adding a closed wall chain, click the last point to the start point. The wall chain is closed automatically. If you are designing a parametric building model and the Automatic floors setting is enabled, the program will ask you to select a floor structure. You can select the default floor defined for the main height level by clicking Default Floor.
 Note
Note
- See also Adding a Wall in a Parametric Building Model.
- See also Adding a Log Wall.
- If you start selecting exterior wall points by moving counter-clockwise, select the Adding a Mirrored Wall auxiliary function.

