
Adding a Cladding
Framer
When you are adding a cladding, select the properties of a cladding as follows:
- Select the properties of the cladding in the Cladding Selection dialog box.
 Cladding Selection Dialog Box
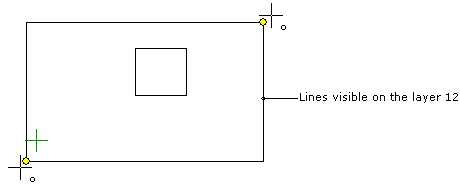
 - Select the area where the cladding is added. Select the area by clicking two corner
points. The outline of the siding is drawn on the layer 12 in the
panel drawing. You can first make the layer visible by using the function
 Select Layers from
List on the tool strip, and then select the corner points of the cladding area
by snapping the corner points of the siding.
Select Layers from
List on the tool strip, and then select the corner points of the cladding area
by snapping the corner points of the siding.
- Do either of the following:
- Select the cladding origin.
- Select the Confirm function to use the 3D model's hatch origin as the cladding origin, if it has been defined. If the hatch origin has not been defined, the cladding origin is set to the origin of the panel drawing.
- If you selected the layer 12 to be visible and hid all the other layers, select the layer
group of the panel drawing visible. In the basic software delivery, the layer group name is
Wall Panels. Alternatively, you can change all layers visible by
using the function
 All
Layers on the tool strip.
All
Layers on the tool strip. - Close and save the panel drawing.
Note:
- You can define default saw machinings for the cladding, which can be transferred to the production management system. You will need a customer fitting to be able to use this feature.