
Export to Video
You can record a video of the functions of the Vertex program. By recording a video you can, for example, create an installation or usage guide or communicate easily with Vertex Helpdesk.
When recording, the program takes frames of a specified area of the screen at a specified frame rate. The captured frames are saved in a temporary folder in the user folder of the Vertex program. When the recording is finished, a video is created from the saved frames, after which the frames and the temporary folder are deleted.
In case the program is closed before finishing the recording, the frames are kept in the temporary folder. The next time the program is started, you can choose to create a video from the frames in the temporary folder. This way you can save the video even if the program stops responding in the middle of video recording.
Define the recording settings and record a video as follows:
- Select File >
 Export >
  Export to Video.
 - Edit the settings in the Screen Recording dialog box.
- Select .
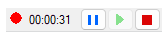
When video recording is in progress, a control bar is displayed above the ribbon, where you can see the duration of the recording. You can use the bar's controls to pause, continue, and stop the recording.
 Note: The control bar is visible when Show screen recorder toolbar is selected in the video recording settings. When the control bar is hidden, you can pause recording by pressing Shift+F12, and resume recording by pressing Shift+F12 again.
 - To stop recording, click
 End recording in the control bar or press Shift+F11.
You can see the video details in the Screen Recording dialog box that opens. At the top of the dialog box, you will see an estimate of the time it will take to create the video.
- Select one of the following:
- Play video - Play the video with the default program selected for the MP4 file in the operating system.
- Open file location - Open the video file's storage folder in the Windows file explorer.
- Copy to clipboard - Copy the video file to the clipboard.
- Create video with different settings - If the video size is too large or the quality is too poor, you can recreate the video with different settings instead of recording the video again. At the top of the Screen Recording dialog box, you can see the current file size, video quality, and finishing. When you click Create video with different settings, you can choose the video quality and finishing of the video file again. Click OK, and the program will recreate the video with the new settings.
- Cancel video creation - If the recording does not go as expected or you forget it running for a long time, you can cancel the video creation as long as the creation is in progress. The program will ask for confirmation to cancel.
- Click Exit to close the dialog box and quit the function.
Create the Video After Interruption
In case the program is closed before finishing the recording, the frames are kept in the temporary folder../user/ScreenRecorder/Temp. The next time the program is started, you can choose to create a video from the frames in the temporary folder. This way you can save the video even if the program stops responding in the middle of video recording.
- Select
 Create the video with full length. The length of the video to be created is the Maximum video length.
 - Clear
 Create the video with full length, and enter Video length (from the end) in minutes and seconds in the text fields.