Screen Recording Dialog Box
When you record a video of the Vertex functions, select the video recording settings in the dialog box.
Dialog Box Options
- Area to be recorded
- Select the area to be recorded from the list.
- All displays - If you have multiple displays, all displays will be recorded. The video is recorded from the entire area of the displays, which means that the operating system taskbar is recorded on the video, for example. In addition to the Vertex program, the video captures everything else that is visible on the displays.
- Active display - Only the active display is recorded. The video is recorded from the entire display area, which means that the operating system taskbar is recorded on the video, for example. In addition to the Vertex program, the video captures everything else that is visible on the display.
- Vertex application window - The video is recorded from the area where the Vertex program window is located. Everything that is visible on the computer screen in that area is recorded on the video.
- Vertex working window - The video is recorded from the area where the active working window (drawing or model window) is located. Everything that is visible on the computer screen in that area is recorded on the video.
- Simplified working window - Available when the model window is active. The video is recorded from the area where the active model window is located without the menus, buttons, and cursor of the program's user interface. You can use the option to create videos for marketing or review purposes.
- Video quality
- Select the quality of the video. The higher the quality, the more storage capacity the video will require. The quality of the video does not affect the performance or the use of disk space during video recording, but only the video created as a final product. Select one of the following:
- Best quality, largest file
- High quality, larger file
- Default
- Lower quality, smaller file
- Video file finishing
- Select the level of compression for the finishing step of the video file. When more time is used in finishing the video, the resulting video will require less storage capacity. Finishing the video does not affect the performance or the use of disk space during the video recording, but only the video created as a final product.
- Frame rate (fps)
- Select the frame rate of the video, or how many frames per second are taken in the video. You can select 4, 6, 12 or 24 frames per second.
- Recording length
- Select the length of the final video:
- Indefinitely - The final video is created from the beginning of the recording to the end.
- Time window - The recording is on from the start to the end, but the final video is made only from the last clip, the length of which you can set in Save the last. Enter the length in minutes and seconds in the text fields.
- Record audio
- You can record the video audio. The audio source may be:
- Input device - Use a microphone as the audio source. Select which input device you are using from the list.
- System audio
- Video file name
- The program automatically creates the folder user/ScreenRecorder for the files generated during video recording. By default, the finished video file with or without audio is saved in the Video folder. The file type is MP4 video.
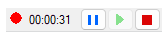
- Show screen recorder toolbar
- When video recording is in progress, a control bar is displayed above the ribbon, where you can see the duration of the recording. You can use the bar's controls to pause, continue, and stop the recording.