
Add One Machining Line to a Panel
Framer
Add a machining line to a selected panel as follows:
- Select the panel.
- Select Panel | Framing |
 NC Accessories
 Add NC Accessory to Panel.
 - Select the layer, on which the machining is to be added. The list shows the framed layers of the selected panel.
- Select a machining from the list. Machinings are customer-specific.
- Do either of the following:
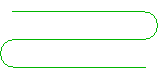
- Add a machining line formed by a line chain.
Draw the line chain before adding the machining.
- Select
 Select line chain from the auxiliary menu.
 - If you wish to find the entire line chain automatically, select
 Find chain automatically from the auxiliary menu. When the function is disabled, you can click the parts of the line chain one by one.
 - Click the line chain you have drawn earlier.
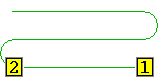
- If necessary, change the direction of the machining line by using the auxiliary menu function
 Reverse direction.
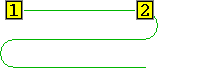
- Select Confirm. You will be prompted: "Delete original line chain?"
- If you want to keep the line chain for copying, for example, select No. If you want to delete the line chain, select Yes.
- Select
- Add a straight machining line.

- Disable the function Select line chain in the auxiliary menu.
- Click the start point of the line.
- Click the end point of the line.
- Disable the function
- Add a machining line formed by a line chain.
Note:
- When you are panelizing walls using the method based on the panel drawings, select Classic Wall Framing |
 NC Accessories
  Add NC Accessory to Panel, and select the panel.