Beam to Beam
Form the joint between the primary beam and another beam. When you move either beam, the joint components move with it.
- Select Modeling | Connection |
 Joint
Joint  Profiles
 Connection
Details.
Connection
Details. - Select the Beams folder in the browser. Select the Beam to beam joint.
- Select the joint component and joint properties in a dialog box.
- Select the Custom or Standard library.
- To select the joint component, click the Select button. The button opens a list in accordance with the library selected, from which you can select the joint component.
- Select either of the following:
- One Side - The joint component is only added on one side of the beam to be joined.
- Both Sides - The joint component is added on both sides of the beam.
- Select the primary beam.
- Select the beam to be joined to the primary beam. Select several beams with the Ctrl key pressed down.
- Select Confirm. The program will mark the joints with arrow
symbols.

- If necessary, mirror or rotate the symbols before accepting the joints. Click the
FUNCTION button and select one of the following:
- Mirror. Select the symbols to be mirrored.
- Rotate. Select the symbols to be rotated.
- Mirror all. All symbols are mirrored automatically.
- Rotate all. All symbols are rotated automatically.
- Select Confirm.
- If necessary, delete the existing joint by selecting Delete in a
message box.
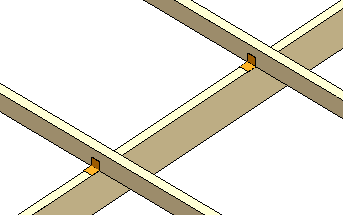
The program will position the joint components on the center line of the primary beam. If the beam to be joined does not reach the center of the primary beam, the joint will not be formed. The geometry of the joint components is displayed both in the 3D model and the 2D drawing.