Fill a Gap
Advanced Face Modeling Package
General
- You can fill a gap in a model with a tangential face. A gap is a face missing from the model.
- This functionality requires the Advanced Face Modeling Functions add-on option.
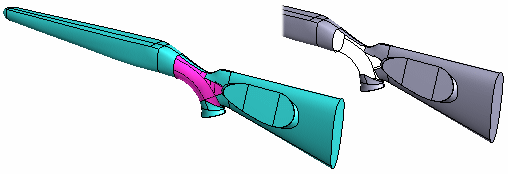
- This function is required when you import from another CAD system a model that is missing a face or faces, or from which you want to replace an invalid face with a new tangential face.
- It is usually not possible to perform all the normal modeling operations on such a model until the missing faces have been added and it has been formed into a volume.
- You can also use this function when you have removed a face (invalid or a planar surface, for example) from a part model and want to replace that face with a new tangential face.
 If no tangential requirements are set for the face to be added, you can try to create a volume with the To Volume function.
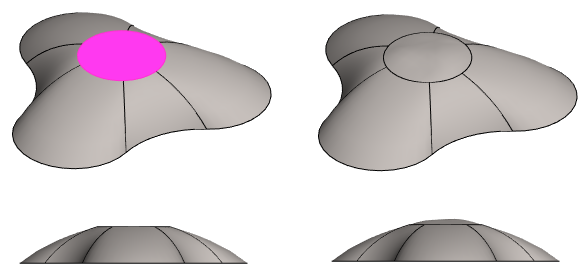
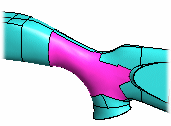
- In the figure, the (red) plane surface has been replaced by a tangential face.
Fill the hole in the face of a part
- Select the ribbon bar function Part | Faces |
 Fill Gap or.
- Import | Faces | Fill Gap.
- The program opens the Fill Gap dialog box and
- asks you to select a face.
- Import | Faces |
- Click a face or faces to be replaced.
- Select Confirm (Confirm = V key, middle mouse button or the context-sensitive function
 OK).
OK).- The program marks the selected faces in the model with red
- And adds the faces to the Faces to be replaced list of the dialog box.
- Define the information of the gap to be filled in the dialog box.
- Define the flattening. The default is 0 (zero) and, if necessary, Formula.
- Enable
 or disable
  Invert face direction.
 - Enable or disable Maximum number of spans.
- If you select the former, use the slider to adjust how closely the face follows the guide curves.
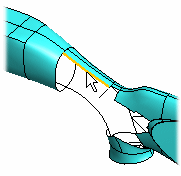
- If necessary, select the guide curve lines that control the tangential face.
- Click Apply to see what the part will look like with the values you enter.
- Edit the data in the dialog box, if necessary.
- Select OK.
From the context-sensitive menu
First, remove unsatisfactory faces.
Fill a Gap:
- Select a line from the gap.
- Select the context-sensitive function
 Faces >
  Fill Gap.
 - Continue as above, steps 4...6.