
Example
You can create a library feature as follows:
- Create a new model. Save it as a part.
- Reserve a model number in the archive.
- Open the sketching mode by selecting the
 New Sketch> Horizontal(XY) Plane function.
 - Draw the sketch in the origin of the sketching coordinate system (A). Draw the rotation axis in the direction of the vertical axis of the sketching coordinate system (B). The sketch is to be rotated around the axis, adding material. You can see the exact dimensions in the figure showing the dimension constraints.
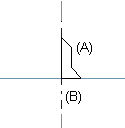
The origin of the part's first sketch will become the handle of the finished library feature, unless you determine the point separately. In the sketch, the Z axis points towards the viewer, so the origin cannot be used as the handle of this library feature. You can define the insertion point after finishing the part's geometry.
- Add geometric distance and angle constraints for the elements in the sketch.
Enable the editing of the part's geometry. Define variables for dimension constraints (A), (B) and (C) in the Formula field in the Geometric Constraints dialog box as follows:
Dimension constraint (A): d/2
Dimension constraint (B): s
Dimension constraint (C): D/2
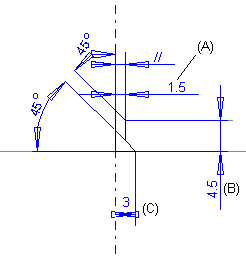
Make the vertical line on the sketch parallel to the rotation axis (//). Make the vertical axis of the sketching coordinate system coincident with the start point of the rotation axis. Also, make the end point of the rotation axis coincident with the vertical axis.
Make the point on the sketch coincident with the vertical axis.

Make the other point on the sketch coincident with the horizontal axis.

- Select
 OK. Select the Revolved Boss operation. Define the angle as 360 degrees.
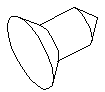
- After finishing the part, define the location of the handle on the planar face of the part so that the Z axis is perpendicular to the face (for more details, see Adding a handle.
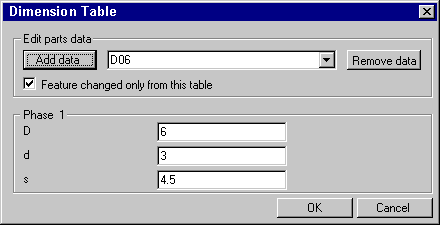
- Before saving the part, determine the part's dimension table. First select the part and then the Dimension Table function. A new dialog box will open, in which you can define the table values. Enter the table ID, define the variable values and click the Add Data button. Add data with different variable values in the dimension table. Confirm the table data.
- Save the part as a feature by selecting Save To Library> As Feature. Enter a name for the sketch.
- You can also save the part in the archive if you want. Please note that the library feature is not associated with the part, which means that changes made to the part will not affect the library feature. If you want to edit the library feature later, you can open the part from the archive or the model from the feature directory. We recommend editing the model in the feature directory with the file name of the library feature. You can save the edited model with the same file name.