
Edit Pipeline Welds
With the Edit pipeline welds function, you can change the weld data for the entire pipeline, for a selected section, or between selected pipe parts one by one. You can also edit the data for an individual weld by double-clicking it or by selecting a weld part and selecting Piping → Edit pipeline welds from the right-click menu
- Select
- On the Assembly tab, from the
 Welds menu, function >
  Edit pipeline welds
 - Or select Piping → Edit pipeline welds from the context-sensitive menu
- On the Assembly tab, from the
- The program opens an auxiliary function menu in the upper left corner of the model window.
Options in the auxiliary function menu, starting from the top: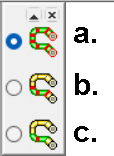
- This will target the entire pipe line.
- This will target the section between clicked parts. Click the part from which the section starts and the last part of the section.
- Add a single weld by clicking two adjacent pipe parts.
- Change the required values in the Welding data dialog box.
- You can copy the data from the model from the selected weld. Select the button Copy all data from model
- You can copy the data only to the active field in the dialog box. Select the button Copy data from model in active field
- In some fields, you can select data using presets. Select the field and button Preset values for active field
- Exit the dialog box and press OK to save the values you entered