Adding a View to a Wall Panel Drawing
Framer
You can add different views of a wall panel to a wall panel drawing, for example external or internal sheathing to its own view drawing. The view shows the pieces on certain layers of the wall panel drawing. The pieces are copied and drawn on a new layer in the view drawing so that you can switch the view on or off in the wall panel drawing by changing the visibility of the layer. You can define up to ten different views for a wall panel drawing.
The views are defined using the keyword secview in the BDSXX keyword group. The keyword is given a group of comma-separated parameters as the value:
secview= NewLev,Mir,Scale,GapX,GapY,Dx,Dy,Layers
The parameters are:
- NewLev: The new level to which the pieces are copied.
- Mir: Mirror. Possible values are 0 = no mirror or 1 = mirrored.
- Scale: Scale factor of the view. Factor used to multiply the size of the original wall panel drawing. For example, if the factor is 0.5, the size of the view drawing is half of the original wall panel drawing.
- GapX: Horizontal gap between the views in the view scale.
- GapY: Vertical gap between the views in the view scale.
- Dx: Factor that determines the horizontal location of the view in relation to the original wall panel drawing. The view width is multiplied by the factor. GapX is added to the result for the final offset.
- Dy: Factor that determines the vertical location of the view in relation to the original wall panel drawing. The view height is multiplied by the factor. GapY is added to the result for the final offset.
- Layers: The layers, to which the drawn pieces are copied.
The parameters can have the following values, for example:
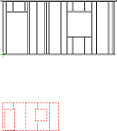
| secview= 50,0,0.5,1000,1000,0,-1,156
|
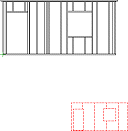
secview= 50,0,0.5,1000,1000,0.5,-1,156
|
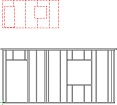
| secview= 50,0,0.5,1000,1000,0,1,156
|
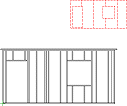
secview= 50,0,0.5,1000,1000,0,1,156
|
There can be up to 10 secview lines. Each row corresponds to one view in the wall panel drawing.
 Note
Note
- In the panel drawing, pieces have been drawn on the following layers, among others:
- 16 Wall framing lines: insulation
- 151 Lumber
- 155 Internal Sheathing
- 156 External Sheathing
- 162 Dimensions
- 175 Profile Color Fills
- 255 Nominal Line of Studs
- Adding views to a wall panel drawing requires that the template sheet be large enough. The template sheets of the wall panel drawings are stored in the picts/wallpnl folder.
- A default label location (in the middle of the piece) has been defined for the different
panel pieces in the panel drawing. When you create the panel drawing, the piece label
location in the main view changes, if it is overlapping a label of another piece. Moving
labels in other views can be prevented by using the keyword panel_mark_midlbl_types in the
WALLS keyword group. The types of the profiles whose labels are positioned in the default
location are set as the keyword value, for example:
panel_mark_midlbl_types= 34 42


