Library Data of a Wall with a Layer Structure
Open the library data of a wall for editing as follows:
- Select System | Libraries |
 Walls.
 - Select a library and a classification in the list box.
- Select the thumbnail image of a component.
- Right-click to open the context-sensitive menu.
- Select Properties.
Define the wall's library data in the dialog box.
Dialog Box Options
- Order
- The order number determines the order in which the wall thumbnails are displayed in the wall dialog box. The default wall of the library is the one with the smallest order number.
- Type
- Select the wall type from the list. The type affects how the wall is handled in the model and in the floor plan, for example when creating connections between walls or generating wall panel breaks. If necessary, edit the Selection group according to the type as well.
- Active
- When this checkbox is ticked, the wall structure is available, and users can select the wall to be added in the Wall dialog box.
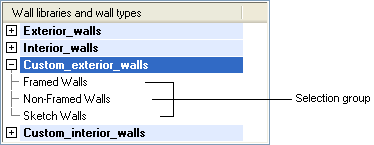
- Selection Group
- Walls are grouped in the wall library according to the selection group. Enter the desired selection group in the text field.
- Name
- Enter a name for the wall in the text field.
- File
- Enter the name of the wall's model file in the text field. The file extension of the file must be .vxm. Information on the wall's layers and their properties is stored in the model file.
- Description
- Enter a wall description text in the field. The description will be displayed for the wall's thumbnail image.

 If you wish to add a wall under an existing selection group, make sure that the group is always written in exactly the same way.