Add a Log
Log House Design
You can add a new log to the top or bottom of an opening in a log wall. The log can be full-height or undersized. Use the function in the model or in the log wall elevation.
- Do either of the following:
- Select a wall in the model. Select Log Wall | Log Wall |
 Add
Log.
 - Open the elevation of the log wall. Select Log Wall Layout |
Log |
 Add, or right-click to open the context-sensitive menu, and
select
  Add
Log.
- Select a wall in the model. Select Log Wall | Log Wall |
- Enter the log height in the text window. As a default, the text field contains the full
height of the log profile. If you want to add a log with an undersized profile, do one of
the following:
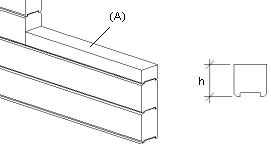
- Enter a negative value in the text field, if you wish to add the lower part of a log
profile, for example a log above another log (A).

- Enter a positive value in the text field, if you wish to add the top part of a log
profile, for example a log below another log (B).

- Enter a negative value in the text field, if you wish to add the lower part of a log
profile, for example a log above another log (A).
- Select the locating point in one of the following ways:
- Select one of the nine points on a rectangle drawn around the cross section as the
locating point from the auxiliary menu.

- Select the
 Select Locating Point function from the auxiliary menu, and
select any point on the cross section as the locating point. If required, you can change
the locating point to one of the nine quick-selection points, and then activate the
selected locating point again by selecting the
  Free Locating
Point function.
- Select one of the nine points on a rectangle drawn around the cross section as the
locating point from the auxiliary menu.
- Select the profile's first point.
- Select the profile's second point.
Note:
- Open the log wall elevation with the Edit Log Wall Shape function.
- You can also add logs to the elevation by using the general
 Copy command in the
context-sensitive menu.
 - You can delete a log with the Delete a Log function.
