
Create Stacks
Framer
You can create stacks of panels whose panel drawing is up to date. If necessary, you can check the status of the panel drawings.
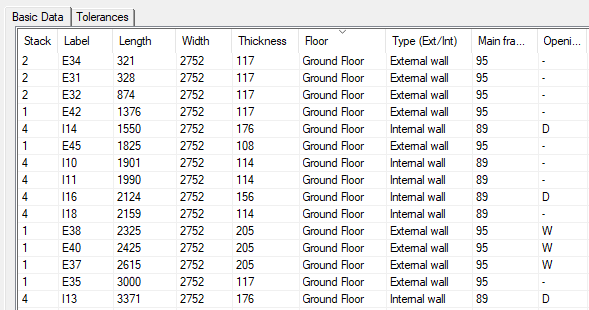
You can select the panels from which the stacks are formed either in the drawing or model window of the open drawing-model pair or in the list of the dialog box. All panels of the building are collected in the list. Panels whose panel drawing is not up-to-date are shown in the list with a gray background and are not selectable for stacking. You can restrict the panels displayed in the list by using the column filtering feature.

The stacking principle (length, width, or area) is defined in the stack settings.
Create the stacks as follows:
- Do either of the following:
- Select Output | Panels and Trusses |
 3D Panel Stacking.
 - In the document browser, select the heading
 Stacking and
  Edit stack contents from the right-click menu.
The Modify Stack Contents dialog box opens. The steps below are an example of how to create stacks. See other options and more detailed information of the dialog box:
- Select Output | Panels and Trusses |
- You can restrict the panels displayed in the panel list by using the column filtering feature. For example, you can only filter out certain types of panels on a specific floor. Set the filter by entering a search term in the filter field. The search term may be one or more characters, for example a character in the panel label. You can also click the
 button and select a search term from the list.
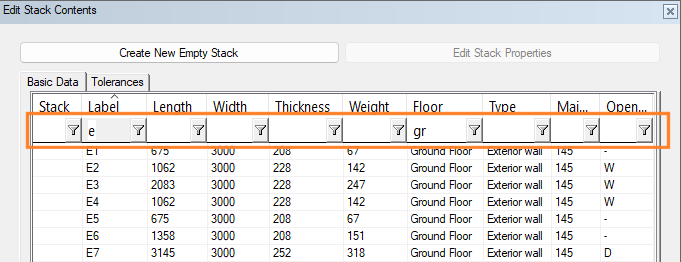
You can sort the panel list by clicking on the desired column header. You can sort the panels by label, type, or floor, for example.
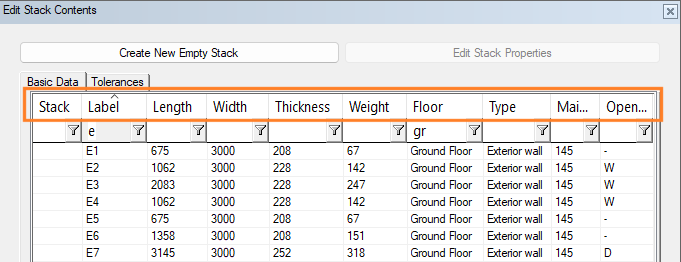
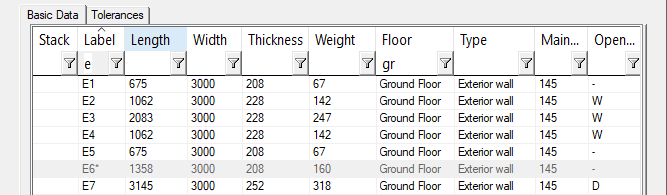
Panels with missing panel drawings or drawings that are out of date cannot be added to the stack. They are presented in the list with a gray background.
- Select the panels from which the stacks will be formed. The stacks will have the same properties. You can select the panels either by clicking in the model next to the dialog box or from the list in the dialog box. Select the panels from the list in one of the following ways:
- Select the panels one by one by Ctrl-clicking the rows.
- Select a set of rows:
- Click the first row.
- Press the Shift key, and click the last row of the set.
- Click Select all to select all panels.
- You can clear the selection by clicking Clear all.
- Right-click and select Add to new stack. The Stack Properties dialog box opens.
- Select the stack properties in the dialog box and click OK.
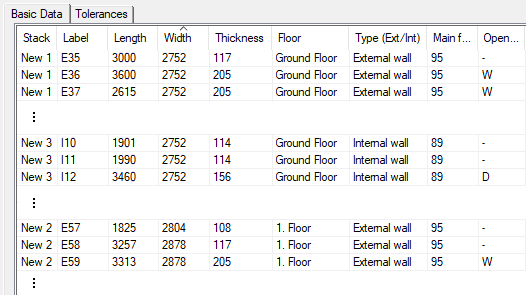
You will return to the Modify Stack Contents dialog box. Each selected panel has the value New 1 in the Stack column. This means that these panels will be added to the stacks with the newly selected properties. The final number of stacks depends on the properties selected for the stacks: when no more panels can fit in the stack, the program creates a new stack.
- If you want to define stacks with different properties, select new panels and again Add to new stack from the right-click menu. Again select stack properties in the dialog box.
- Finally, click Build stacks. The program will create the stacks. Stack numbers are shown in the Stack column.
- Click OK to close the dialog box. The stacks are updated under the Stacking heading in the document browser.

- Save the building.
- You may receive an error message if a panel is too large to fit in a stack, or if there are too many panels in a stack.