The dialog box opens when you create stacks of panels. The windows of the open drawing-model pair are displayed next to the dialog box in reduced size.
You can select the panels from which the stacks are formed either in the drawing or model window of the open drawing-model pair or in the list of the dialog box. All panels of the building are collected in the list. You can add a new empty stack and select the panels to add to it. You can change the stack to which the panel belongs or modify the properties of the stack.
Dialog Box Options
- Create new empty stack
- You can add a new empty stack by clicking Create new empty stack. The Create New Stack dialog box opens. Select the stack properties in the dialog box, and click Create stack.
- Create New Stack / Stack Properties Dialog Box
- The program displays the number of the new stack in a message box. After that, you can select the stack number from the list of the Stack field for the panel you want.
- You can set a stack number for several panels at once by selecting rows, and then selecting a value for one row from the Stack list. The same value is set to all the selected rows.
- Edit stack properties
- Edit the properties of the created stacks. The Stack Properties dialog box opens. Select a stack number from the list, edit the properties, and click Save changes. Select another stack from the list, etc. Finally, accept by clicking OK.
- Create New Stack / Stack Properties Dialog Box
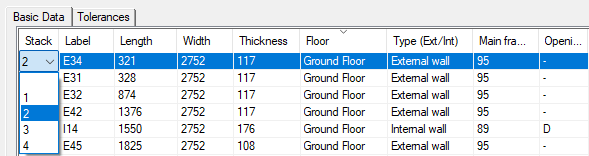
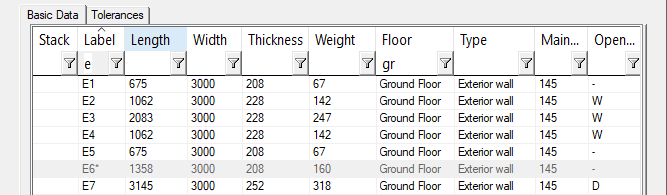
- Basic Data
- All the panels of the building are collected in the list of the dialog box. Panels with missing panel drawings or drawings that are not up to date are displayed in the list with a gray background and cannot be selected for stacking.
- You can restrict the panels displayed in the panel list by using the column filtering feature. For example, you can only filter out certain types of panels on a specific floor. Set the filter by entering a search term in the filter field. The search term may be one or more characters, for example a character in the panel label.
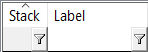
- You can also click the
 button and select a search term from the list.
- Sort the list of panels by clicking on the desired column header. You can sort the panels by label, type, or floor, for example.
-
Note:
- The value in the Thickness column is the thickness of the box to be formed around the panel. This includes all layers of the panel. In a wall panel, windows and doors are also part of the total thickness, if windows and doors have been selected to be attached to the panel in the wall panel settings. If necessary, windows and doors can be left out of the wall panel by selecting in the panel settings that windows and doors are not attached to the panel.
- The program calculates the weight of the panel in the Weight column if the weights of the panel parts have been defined in the building component libraries. For more information, see Panel Weight to Panel Drawing.
- The first time you open the dialog box, the Stack column is empty. Later, the column shows the stack number.
- You can create stacks in the following ways:
- Select the panels from which the stacks are created. The stacks will have the same properties. You can select the panels either by clicking in the model next to the dialog box or from the list in the dialog box. Select the panels from the list in one of the following ways:
- Select the panels one by one by Ctrl-clicking the rows.
-
Select a set of rows:
- Click the first row.
- Press the Shift key, and click the last row of the set.
- Click Select all to select all panels.
After you have selected the panels, select Add to new stack from the right-click menu. Select the stack properties in the dialog box and click OK.
Create New Stack / Stack Properties Dialog Box
Each selected panel has the value New 1 in the Stack column. This means that these panels will be added to the stacks with the newly selected properties.
If you want to define stacks with different properties, select new panels and again Add to new stack from the right-click menu. Again select stack properties in the dialog box.
Finally, click Build stacks. The program will create the stacks. Stack numbers are shown in the Stack column.
Note: You may receive an error message:
- Stack too small. Some panels are too large for the stack.
- The panel exceeds stack's weight limit. The weight limit set for the stack is smaller than the weight of the panel.
- Set the panels in the previously created stack. You may have created the stack as described above, or by clicking Create new empty stack to create an empty stack. Do either of the following:
- Select the stack number from the list in the Stack column for the panel you want.
- You can set a stack number for several panels at once by selecting rows, and then selecting a value for one row from the Stack list. The same value is set to all the selected rows.
- Select several panels, and Add to existing stack from the right-click menu. Select the stack number from the list.
Note: When you close the dialog box, you may receive an error message: Too many panels. Some panels are outside the boundaries of the stack.
- You can remove a panel from the stack as follows:
- Select a panel from the list.
- Right-click and select Remove from stack.
- You can add a character string, a prefix, to the stack label. Add or edit the stack prefix as follows:
- Select one of the panels in the stack.
- Right-click and select Change stack prefix.
- Enter the prefix in a text box.
- When you hover over a stack label in the list, the stack data is displayed as a tip text.

- In the stack data, you can check whether the stack can fit more panels. The Used column shows the stack's current dimensions and weight. The Maximum column shows the maximum dimensions set in the stack properties and a possible weight limit. Marking Based on content means that Dimensions based on content is selected in the properties.
- Tolerances
- You can define a tolerance for the stack panels in the direction of x, y and z coordinates. When the stacks are created, a tolerance size gap is added between the panels in the stack. The gap is visible in the model window when the panel representation is Layers.
- You can set the tolerance for several panels at once by selecting the panels and the direction of the tolerance from the right-click list:
- Set X tolerance
- Set Y tolerance
- Set Z tolerance
- Enter the tolerance value in a text box.
- Select all / Clear all
- Select all panels in the list, or clear all selections.
