
2D Drawing of a Window Or Door
When creating a 2D drawing of a new window or door type, consider the following points.
The drawing origin
The drawing origin must be located at the bottom edge of the door or at the top edge of the window.
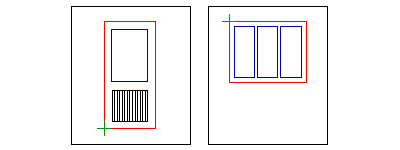
 = Drawing origin
Line types and drawing layers
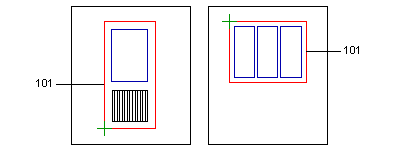
Add the lines on the following layers:
- Outline
The outline (the outer edge of the frame) is an obligatory line. The program creates an opening in the wall based on the outline. The outline must form a closed polyline. It may consist of arcs as well. Draw the outline on the layer 101.
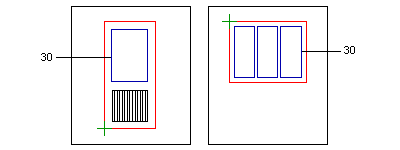
- Glass openings
The glass opening line must form a closed polyline. Based on the line, the program creates an opening to the volume to be created and adds a transparent surface to it. Draw the glass opening line on the layer 30.
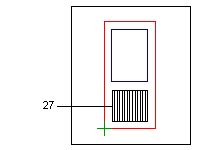
- Other lines
Draw the other lines, for example door handles, on the layer 27 in a door drawing and on the layer 26 in a window drawing.
- Opening trims
If necessary, you can also add trims to the drawing. Both the outer edge line and inner edge line of the trim must form a closed polyline. Draw the outer edge line on the layer 115 and the inner edge line on the layer 116.
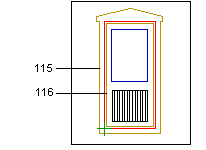
 The inner edge line is not obligatory. If you do not add the inner edge line, the outline of the window or door defines the inner edge of the trim.
Variable dimensions
When adding the window or door, you can change the dimensions of the window or door when you add dimensions to the drawing and vary them. Define the dimension labels as ROW (Rough Opening Width) and ROH (Rough Opening Height). Define the variation area for example in the following way:
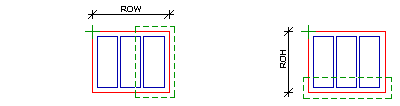
 = Variation area
- The drawing can also be a DWG file converted to a Vertex 2D drawing.