
The Wall Dialog Box - Editing a Wall Library
Edit the wall library in the dialog box. You can only edit customer-specific wall libraries in the custom/complibs/walls folder. You can create a new wall library, edit the default wall properties, add, and delete walls.
Dialog Box Options
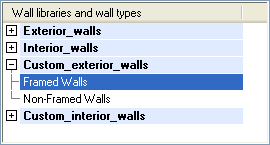
- Wall libraries and wall types
- You may have several libraries available. The walls are grouped by selection groups in the libraries. If you wish to edit an existing wall library, select the library and group from the list in the top left corner of the dialog box. You can search for a library by activating the list box and pressing Ctrl+F. Enter the desired character string in the text field. If you wish to collapse or expand all libraries, right-click to open the context-sensitive menu and select Expand all or Collapse all.
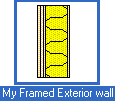
- Wall
- If you wish to edit the layers and parameters of an existing wall, select the thumbnail image of the wall in the bottom left corner of the dialog box. You can search for a wall by activating the list box and pressing Ctrl+F. Enter the desired character string in the text field.
 You can only edit customer-specific wall libraries in the custom/complibs/walls folder. If the wall belongs to the system wall library, the following text is displayed at the bottom of the dialog box: "Please notice that this is a system wall library and cannot be edited."
- Wall parameters
- Wall parameters are available for selection when you have made a wall thumbnail image active by clicking, and no layer is selected in the Layers table or the preview image. If necessary, deselect a layer by clicking an empty space in the Layers table.
- Layers
- Select a type, material, thickness, and bottom and top height for each layer of the wall. You can add and delete layers, move a layer depthwise to the wall, or divide a layer into two parts in the vertical direction.
- A wall must always have a frame layer.
- Layer parameters
- Layer parameters are available for selection, when you have selected a layer in the Layers table or in the preview image.
- Plan / Model preview
- You can select the wall plan or model to be displayed in the preview window. The model is either coarse or accurate, depending on which presentation method you used last when adding a wall. You can select different materials for both coarse and accurate models of the wall layers. You can change the presentation method of the model in the preview window as follows:
- If the model disappears from the preview window, click the button at the top of the window:
 . It will zoom to the extents of the model so that all geometry is within the limits.
 - Select framing, Framing
- These features are available when using the non-layered panelizing method. If a Framing tool has been selected for even one layer of the wall, the features are disabled. See Select a Framing Tool.