
Read Component
Select a component from the library, and add the component to a drawing. First select the folder in the browser, and then select the component from the image menu containing thumbnails of the components. Edit the component data in the dimension table.
Before clicking the component position you can select auxiliary functions, with which you can change the insertion point, or mirror the component, for example.
The component is added to the drawing as a macro. A component added from the library is local. It is not associated with the original library component, which means that changes made to the library component will not be updated to the component added to the drawing.
- On the
 tab, in the Symbols group, select
  Read Component.
 - Select the component in the
 Archives Browser
 - Select the folder, if you wish to add a self-made component from the Own folder.
- Double-click a thumbnail image of the component.
- Define the component's properties in the dimension table.
- From the list, select the table ID determining the size of the component.

If no table IDs have been defined or a suitable size is not found, proceed to edit the dimension constraint values.
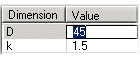
- You can edit the component geometry by editing the dimension constraint values unless it has been blocked. Select a dimension constraint for editing by clicking the Value field. Enter a new value for the dimension constraint.
You can select either Dimension Table or By Constraint Type as the presentation method of the dimension table. Move in the Dimension Table view, from row to row.
- If you change the values of the component dimensions, you can update the changes to the component image, by selecting the Preview button.
- The changes are updated to the component image automatically, if you select
 Update Automatically.
 - If Browse is selected, you can select a new component from the library before confirming the data. Unselect this feature in the presentation method Dimension Table.
- From the list, select the table ID determining the size of the component.
- Click OK.
- Before clicking a position for the component, you can enable an auxiliary function.
- Click a position for the component in the drawing window.
- Select Confirm.
 Select the context-sensitive function Read Component.
- You can edit the geometry of a component added to a drawing by double-clicking the component.
- You can fix the component to another component or other geometry using constraints. When you solve the geometric constraints of a drawing (F5), constraints that are internal to a component are not solved. A component's internal constraints are solved only when the component is edited.
- You can define the component's item data after adding the component.
- You can define the covering property of the component.
- You can add the component data to the drawing by selecting the Notes >
 Feature Data function. The dimension table ID is displayed as the component data.