
Hiding Auxiliary Planes
General
- The Hide planes dialog is available in both assembly and part model modeling mode. The dialog can be opened by pressing CTRL+SHIFT+G by default. In addition, the dialog is opened by the Hide planes function on the View tab. The function is not available in an assembly model if the Dynamic planes mode is on.
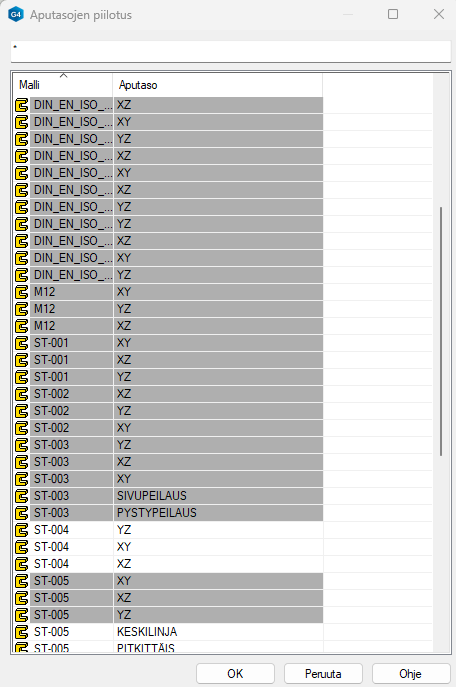
- By default, the dialog has a * character in the search field. In this case, the user is shown all named auxiliary planes that are in the model. The * character can replace a random number of characters. The search is case-insensitive.
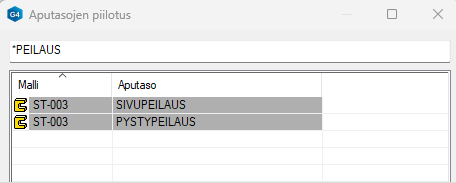
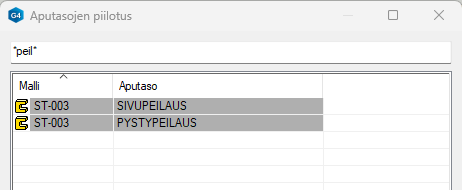
- For example, below, all possible auxiliary planes are first shown in the dialog. The user then refines the search by adding MIRROR after the * character, in which case the dialog shows the user auxiliary planes that match the search. In the third example, the user writes only part of the auxiliary plane name between the * characters, which finds auxiliary planes that match the search.
Functionality:
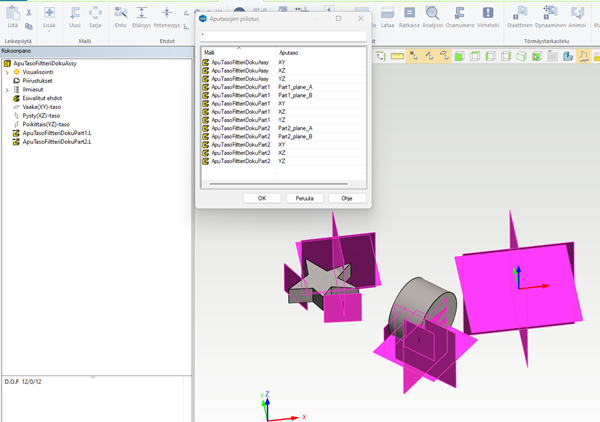
- In the initial situation, the basic auxiliary planes of the assembly and the auxiliary planes created by the user of the parts belonging to the assembly as well as the basic auxiliary planes are visible.
-
In the dialog, each line referring to an auxiliary plane is on a white background.
-
Each auxiliary plane which is displayed in the dialog is marked and remains visible when the dialog is closed (note: only OK completes the dialog function).
-
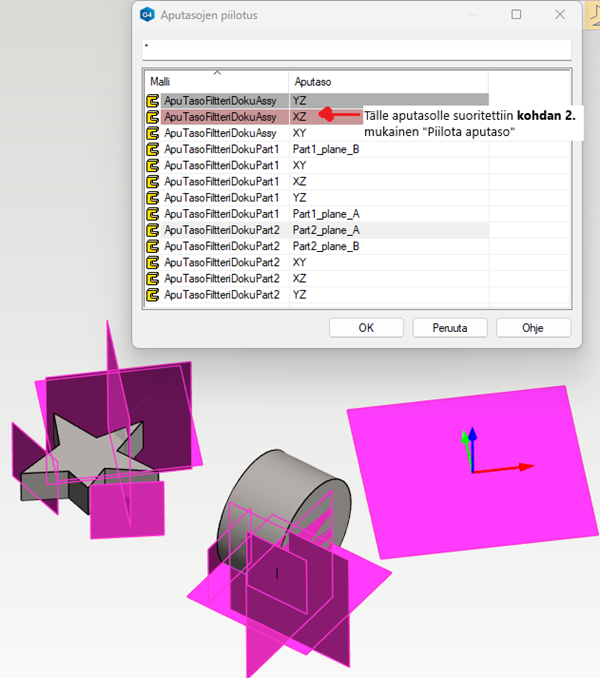
- Next, the user selects Hide plane for the top three auxiliary planes by clicking the right mouse button (For the sake of the example, the 4th auxiliary plane was selected, because the function in question is no longer found for the top three). The rows related to the auxiliary planes turn reddish. This means that when the dialog is closed by pressing OK, the auxiliary planes in question are hidden and the auxiliary planes on a white background remain visible.
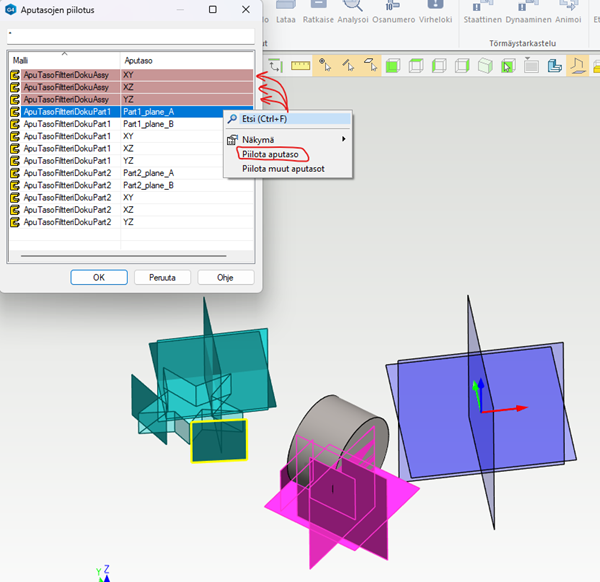
- The user can cancel the hiding by selecting the desired row and executing Restore plane, which causes the row related to the auxiliary plane to turn white, i.e. the auxiliary plane remains visible after closing the dialog.
- After this, OK is selected, which causes the two basic auxiliary planes YZ and XZ to be hidden.
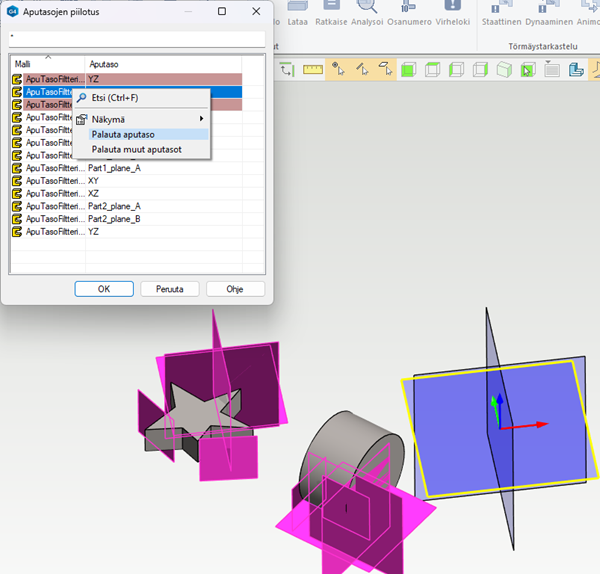
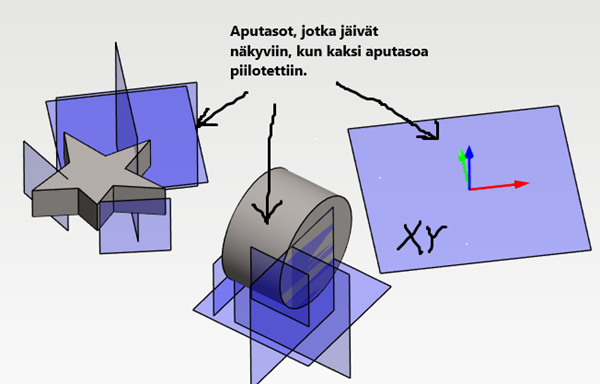
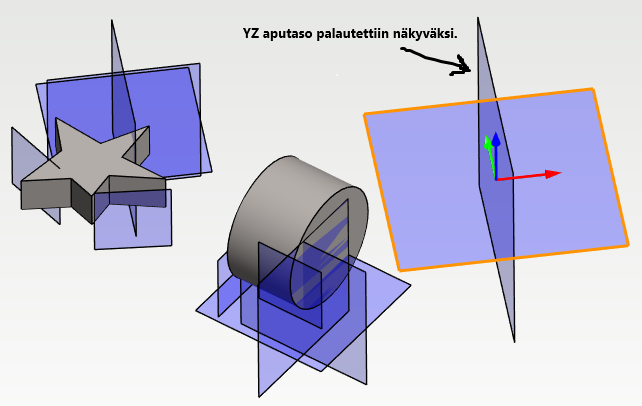
- The dialog is reopened so that we can restore, for example, the YZ auxiliary plane, but leave XZ hidden, as was done in step 2.
By default, the hidden auxiliary planes are displayed in a light gray dialog (top row). If the Hide plane function is not executed for the auxiliary planes in question, they are made visible by closing the dialog with OK.
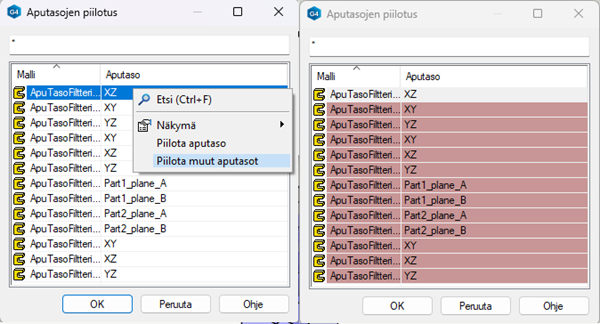
- The dialog is reopened, in which case XZ is still hidden. Thus, the Hide other planes command can be executed for this auxiliary plane. As its name suggests, it performs a similar function, but for all other auxiliary planes. In this situation, closing the dialog would make the hidden auxiliary plane visible and the other auxiliary planes hidden.
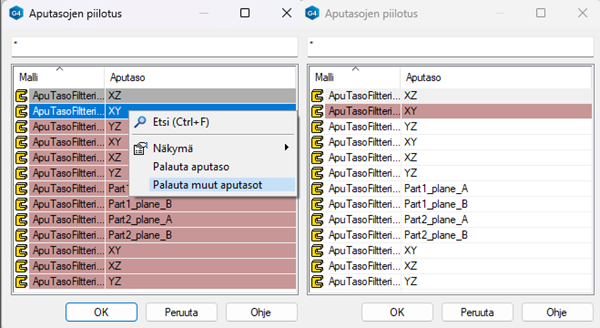
- Let's next examine the last function, Restore other planes, without closing the dialog in between. The command is executed for the XY auxiliary plane on the second-highest row after the previous situation. This leaves the auxiliary plane in question in a state where the auxiliary plane is hidden when the dialog is closed (note: only OK) and other auxiliary planes that were previously hidden are restored to a state where they are visible after closing the dialog.
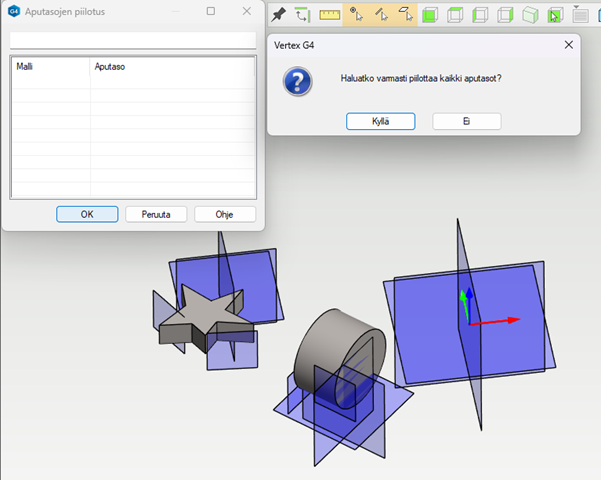
- You can also hide all auxiliary planes through the dialog so that no auxiliary planes are found with the input given in the search field. Similarly, if the user performs the Hide planes function for each auxiliary plane found, the end result is the same. The user is also asked to confirm the matter with an additional question. Even if the user presses Yes, the easiest way to display the auxiliary planes is to open the Hide planes dialog and close it without making any changes.
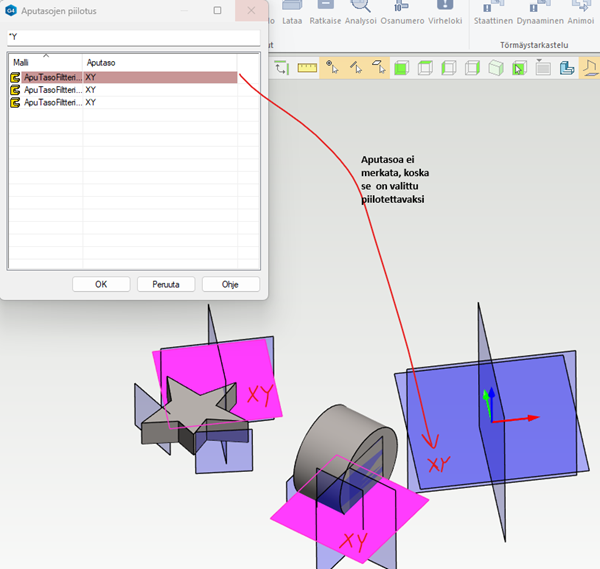
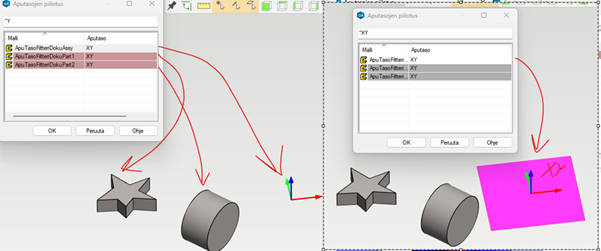
- For observation purposes, let's look at a situation where the user has only searched for auxiliary planes with the *Y string, all of which are hidden after step x. The user has selected Hide planes for the two lowest auxiliary planes, which means they are kept hidden and only the basic auxiliary plane XY of the assembly model is restored to visibility. This also illustrates that the dialog makes visible the restoration of those auxiliary planes that are in the list. Hiding is done by default for all planes that do not match the input in the search field or that have been manually hidden by the user in the dialog (see previous steps above).
-
Left image initial situation
-
Right image situation when the dialog is closed and reopened.
-
Note:
- Since in Vertex CAD programs, link parts / link assemblies are instances of the same model, the dialog only displays the auxiliary planes of each model once. For example, if the user had ten cylindrical parts in the assembly according to the examples above, the dialog would display the associated auxiliary planes (XY, XZ, YZ, Part2_plane_A and Part2_plane_B) once. Similarly, if the user hides / restores auxiliary planes, the operation is performed for each instance of the link part. This is because Vertex 3D models are implemented this way.
- If the part / assembly is local, then the data related to the auxiliary plane is displayed in the dialog for that model, and therefore the hiding / restoring visibility is only done for the auxiliary planes of that model. Similarly, if the auxiliary planes of a local model are hidden, the change is also valid within that model. In other words, the hiding state is also valid when the model in question is taken for editing. With link models, that change in the hiding state does not go all the way to the model, but is only effective in the model in which it was made.