Dimensioning an Angle
This function can be used to dimension the angle between two line elements. If there are no line elements in the model for defining the angle, you can select direction points to determine the start and end line of the angle. After selecting the dimension type, select the projection plane.

Dimension an angle as follows:
- Select Drafting | Dimensions |
 Dimension
 Angle.
 - The dimension type is Angle.
- Select the projection plane.
- Do one of the following:
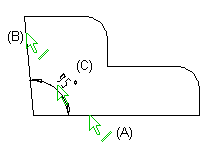
- Click the dimension start line (A) and end line (B).
- Select the start line and end line by clicking two direction points for each.
- Click the location of the dimension (C).
Selecting Direction Points to Define an Angle
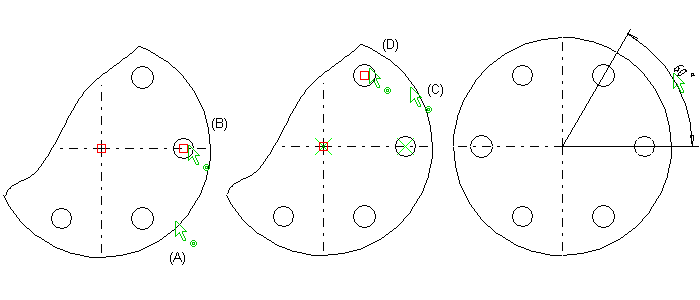
To dimension an angle in a parallel projection, the start line of the angle is defined with the direction points (A) and (B), which are the center points of the circles. Correspondingly, the end line is defined with the points (C) and (D), after which the position of the dimension is selected.

 Note
Note
- After selecting the position of the dimension, you can still change the position by using the cursor keys.
- To edit the dimension precision or the dimension properties, click the dimension in the basic mode of the program and select the Properties function from the context-sensitive menu.
