Hatch
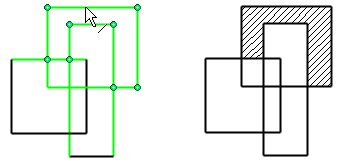
Add hatch to a continuous area, or to the area limited by the continuous line. There can be areas without hatching inside the area delimiting the hatching.
The hatches can be formed both 3D projection and from the lines added afterwards (drawn lines) You can select the hatch type and its properties directly. Select the search method for selecting the edge line of a hatch.

- On the
 tab, in the Hatch group, click
  Hatch.
 - Click the line limiting the hatch.
- On the
 tab, in the Properties group, click Style, Color, Properties, Angle, Pen and Hatch.
 - Select Confirm.
- Select the hatch properties.
 Hatch Dialog Box
 - Select Confirm.
Automatic search of limits
- Select
 Automatic Search of Limits.
  Search Limits
 - Click the edge line of the hatching area, according to the selected search method.
- Do as follows:
- 2D Drawing:: Select the contour line of the hole.
- Model drawing: Select an edge line from the projection.
- Select Confirm.
 A continuous area may contain one or more holes. Select the outermost contour line of the hatch and the contour lines of the holes when adding a hatch.

Note:
- Vertex G4: Model drawing – In a model drawing, the section hatch can be determined in the part properties.
- If you have changed the hatch in the model drawing by using the function
 Hatch function, you can cancel the change by removing the hatch from the projection, and by selecting the context-sensitive function Update drawing. This will update the hatch defined in the part properties to the section view.
 - Hatch Origin – You can point the origin to the hatch, which is in the 2D drawing, or in the projection of the model.
