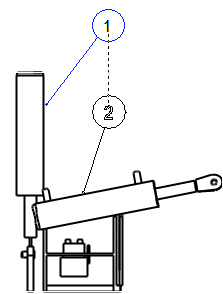
Part Number into Model Drawing
Number the drawing of the part model or assembly model. Number the parts to the drawing, which you open in the parts feature tree, or assembly tree under the  Drawings symbol.
Part numbers are displayed in the table subassemblies first, then individual archived parts, and library components last.
- On the
 tab, in the Mechanical group, select Parts List, and select
  Part Number.
 - Define in the Part number dialog Boxx the start number. Number 1, for example. Define also the number Increment.
 Sometimes the marking of parts and assemblies can take an unreasonably long time, and adding the part numbers without marking would be desirable. In such a case, select
  No Element Marking in the part number properties.
 - Click Number.
The parts list is displayed in the table. You can sort the list according to the Type column, for example. The type numbers have the following meanings:
Type Meaning 1 Archived assembly. 2 Archived part. 3 Local part. 4 Library component 5 Profile Part -
You can supplement part numbers in the empty part number fields of the table as follows:
- Type the number.
- Press the F5 key in an empty field to fill the field with the next available number.
- Use the Number button to add part numbers to all parts which do not have the number.
- Click OK. The geometry of the numbered part is highlighted with a color in the drawing.
- Select a line or a point in the part's geometry as a starting point of the reference line, and click the position of the part number.
- Continue by clicking the next part number.
 Note to the previous number automatic out line when moving the cursor: as an example, vertical or horizontal direction, when you are position the part number.

You can follow on the status bar what part number you are adding. The program will notify you when all parts have been numbered.
- If you wish to add the same part number to several projections, do as follows:
- Hold down Ctrl key, click the start point of the part number and the position for the first time.
- Continue adding the same part number to other projection in the same way.
- When you wish to continue numbering with the next part number, release the Ctrl key before adding the same part number for the last time.
The part number will only change after you have added the same part number once more after releasing the Ctrl key.
- Select Confirm.
- If you open the drawing in the Browser, model's part numering is not available. You must open the drawing via the model.
- To edit part number properties, select a part number and select the context-sensitive function Properties.
- You can also add a 2d part number to the drawing of a model and connect attribute data to it, which will be collected in the parts list. This way you can add parts number to the drawing when you open the drawing of the model by the function
 Browse - Archives Add the part number in the same way as to the drawn drawing.
- A drawing can have model projections and elements added with the 2D drawing functions. The part numbers associated with them can be indicated with different colors, so that the part number of the geometry from 3D is of a different color to the part number of the geometry drawn in 2D. You can define the keyword treedeepnocolor= color in the draft keyword group, in which the color is the number of the color in the user/pmap file.
