
Stack Settings
Framer
You can view and edit stacks in the 3D model window. Define the placement of the stacks in the model window by editing the stack settings. In the settings, you can also select the stacking principle, according to which the order of the panels in the stack is determined.
- Do either of the following:
- Select Output | Panels and Trusses |
 3D Panel Stacking >
  Stack Settings.
 - In the document browser, select the heading
 Stacking and
  Stack Settings from the right-click menu.
The Stack Settings dialog box is opened.
- Select Output | Panels and Trusses |
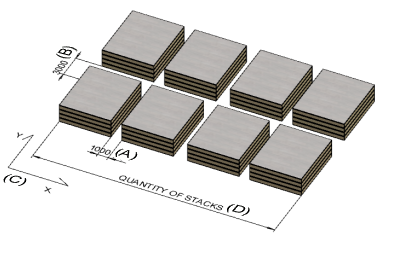
- Define the placement of the stacks in the model window.
- Distance between stacks (A)
- Distance between stack rows (B)
- Direction of stacks (C)
- Quantity of stacks (D)
- Select the others settings:
- Update items after moving - When the property is selected, and you move a panel from one stack to another, the change is automatically updated to the stack data. When the property is not selected and you move a panel from one stack to another, the change must be updated to the stack data using the context-sensitive menu function Update stacks.
- Default presentation - Select the panel representation in the model window.
- Box - A box formed around the panel is displayed in the model window.
- Parts - The parts of the panel are displayed in the model window.
- Layers - The layers of the panel are displayed in the model window.
- Stacking principle - Select the basis by which the order of the panels is determined in a horizontal stack where the panels are on top of each other.
- Length - The longest panel to the bottom.
- Width - The widest panel to the bottom.
- Area - The panel with the largest area to the bottom.
- Confirm by clicking OK.