
Creating Transfer Files
NC Link
To create transfer files, select the production line type from the  NC Output menu on the
Output tab, for example Output | NC Output
NC Output menu on the
Output tab, for example Output | NC Output
![]() Weinmann. This function opens the Create Transfer Files dialog box.
The dialog box list shows the panels collected from the model. The panel information is
displayed in the columns. The displayed information is customer-specific. It may include
Label, Description, Length, Height, Thickness, Group and Status. Status indicates whether the
panel drawing exists or whether it should be updated. If a transfer file already exists, its
name is displayed in the Files column.
Weinmann. This function opens the Create Transfer Files dialog box.
The dialog box list shows the panels collected from the model. The panel information is
displayed in the columns. The displayed information is customer-specific. It may include
Label, Description, Length, Height, Thickness, Group and Status. Status indicates whether the
panel drawing exists or whether it should be updated. If a transfer file already exists, its
name is displayed in the Files column.
- Select Panels.
- Set Printing Text to Profiles on/off (Hundegger add-on option)
- Create Transfer Files
- Open Transfer Files
- Delete Transfer Files
- Group Panels (Weinmann add-on option)
- Quit
Select Panels
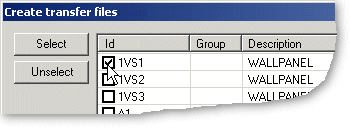
Transfer files are created from those panels whose check box has been selected  . You can select panels in the
following ways:
. You can select panels in the
following ways:
- Click the check box in the Label column of a panel to select it.
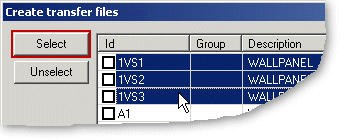
- Select several panels as follows:
- Hold down the Ctrl key and click the panel rows.
- Click the Select button.
You can unselect panels in the following ways:
- Click the check box in the Label column of a panel to clear it.
- You can unselect several panels as follows:
- Hold down the Ctrl key and click the panel rows.
- Click the Unselect button.
Set Printing Text to Profiles on/off
By default, the profile label is printed to the profile. If necessary, you can select the printing on or off as follows:
- Click the Settings button. The Writer Settings dialog box opens.
- Do either of the following:
- Clear the checkbox Print label to profile, when you wish to set the printing off.
- Select the checkbox Print label to profile, when you wish to set the printing on.
- Confirm by clicking OK.
Create Transfer Files
Create the transfer files as follows:
- Select the panels as described above.
 Select Panels.
 - Click the Write Output button.
The names of the transfer files are displayed in the Files column. The transfer files are saved in a folder under the project. The save folder is defined in the settings.
Open Transfer Files
You can open the transfer files in the application associated with the file extension as follows:
- Select the panels as described above. Select Panels.
The name of the transfer file is displayed in the Files field.
- Click the Open button.
Delete Transfer Files
You can delete transfer files as follows:
- Select the panels as described above. Select Panels.
The name of the transfer file is displayed in the Files field.
- Click the Clear Output button.
 Note
Note
- If the panel no longer exists, the system automatically deletes its transfer file, when you open the dialog box. When creating transfer files for the Howick production line, this feature must be separately activated by setting the keyword check_orphans = 1 in the setup file.
Group Panels
Grouping panels included in the Weinmann add-on option. By grouping, from two or more panels you can build one or several panels for the machining line, depending on the maximum length of the line.
- Select the panels as described above. Select Panels.
- Click the Grouping button. The group label is displayed in the Group column.
Quit
Click the Quit button to close the dialog box.