
Model Projections
When you want to view a model from different directions, you have to define a suitable view for the purpose. These views are called projections. A projection can be either axonometric or a perspective.
Isometric Projection
Set the model to the isometric projection.
- On the
 tab, in the Projection group, click
  Isometric View.

- Move the cursor near the top edge in the working window. The Toolstrip is opened, from which you can select an appropriate projection.

Parallel Projection
Set the model in the parallel projection as follows: Front, Top, Left, Right, Bottom, or Back.
- On the tab, in the Projection group, click Parallel Projection.

- Move the cursor to the right edge of the working window. Select the projection on the toolstrip. As,an example, select projection
 Right View.
Select a Projection From the Model
The model is set to the pojection, which is define layer face normal, selected in the model.
- On the tab, in the Projection group, click
 Select From Model.
 - Click a planar face.
Perspective View
Open the 3D model in the working window. Set the model to a perspective view:
On the tab, in the Projection group, select  Perspective. (Ctrl+D).
When Perspective is enabled, the model will always be displayed in a perspective view in the projection you selected. Set the perspective view off by clearing the check box.
Perspective View by Default
You can set perspective as the default projection as follows:
- Select
 >
>  User Preferences >
  Drawings, Models.
 - Select the Usage tab.
- Select Model: Perspective View by Default.
- Confirm by clicking OK.
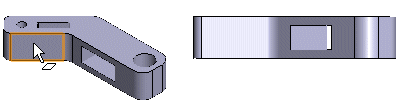
Example - Front parallel projection.

Projection from the front in a perspective view.
