
Limit a 3D Model in the Direction of a Slanted Planar Surface
You can limit the visibility of a shaded model on a slanted planar face selected from the model. In order to select a slanted surface, you need to remove one or more faces from the polyhedron rendered around the model. Limit a model in the direction of a slanted surface as follows:
-
Select View | Limiting |
 Set.
Set. - (OR) Select Set 3D Limits from the tool strip.
- (OR) Select the context-sensitive function Set 3D Limits in the model window.
- (OR) Select
- Move the cursor to the polyhedron face whose removal will allow you to indicate the slanted face.

Figure 1: The topmost face is removed. - Press the Delete key. The face will be removed, allowing you to select the slanted planar face. If necessary, you can remove more than one face from the polyhedron.
- Select the slanted face as the limiting face.

Figure 2: A slanted surface is selected from the model. - Move the limiting face, using the mouse.
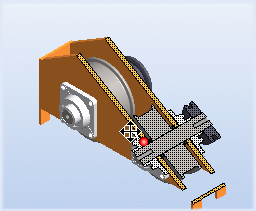
Figure 3: The limiting face is moved to the desired position. - Select the limit point by clicking the left mouse button.

Figure 4: The limit point is selected and the model is cut. - If necessary, select a new limiting face from the model and limit the visibility in the selected direction.
- Confirm the 3D limiting by pressing the middle mouse button.