
Add the Required Drilling
General
- Drillings are library components that include the necessary machining features.
- After adding, moving or editing components, you must remember to do the machinings.
- The users can model and save their own typical drillings in the library.
Starting point
- The BLOCK component has already been added to the assembly.
- See: Start Block Design
Add drillings
- Select the function
 Add >
Add >  Component.
 - Browse and select the drilling component.
- Library: Components/Block Design/Drillings or Components/Block Design/Sun.
- or the user's own libraries.
- Double-click the component that you want to use.
- The program opens the dialog box Select Component and presents the drilling dimensions.
- Enter the dimension in the dimension table and click OK to accept the dimensions.
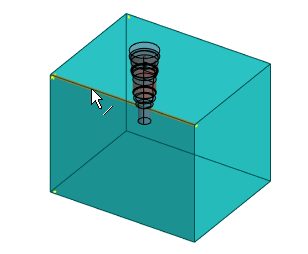
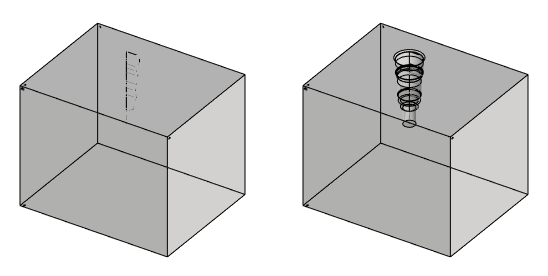
- Place the component on the desired face.
- The program will highlight the face and ask: Edge Distance: Select Element.
- Click the edge line of the block from which you want to enter the distance.
- The program adds the distance constraint and opens the Edit Constraint dialog box.
- You can skip clicking the edge line with the Confirm function and enter the constraint separately later. (Confirm = V key, middle mouse button or the context-sensitive function
 OK.)
OK.)
- Enter the distance constraint and, if necessary, a name for the constraint if you want to identify the distance constraints displayed in the list by name and a formula if you want to control the position of the drilling using the dimension table.
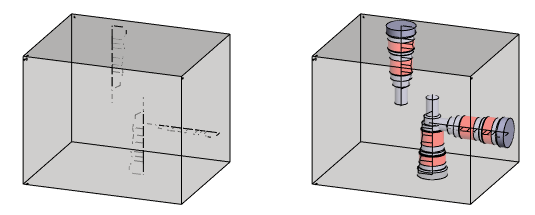
- Click the second edge line of the block from which you want to enter the distance.
- The program adds the distance constraint and opens the Edit Constraint dialog box
- You can skip clicking the edge line with the Confirm function and enter the constraint separately later. (Confirm = V key, middle mouse button or the context-sensitive function OK.)
- Enter the distance constraint and, if necessary, a name for the constraint if you want to identify the distance constraints displayed in the list by name and a formula if you want to control the position of the drilling using the dimension table.
- If you want to add a drilling of exactly the same size as the previous one, select a new place and repeat steps 5...9.
- If you want to add the same drilling component, but with new dimensions, select Confirm and repeat steps 4...9.
- If you want to add another drilling component, select Back when the program opens the dialog box Select Component and repeat steps 2...9.
- Stop adding drillings
- Select another function.
- Press the Esc key.
- Perform the machining by selecting the context-sensitive function
 Machining Features > Execute
- If necessary, you can delete machinings by selecting the Machining Features>
 Delete function.
- If necessary, you can delete machinings by selecting the
Note: Press the M key to show or hide the drilling components
- When you click on a visible drilling component, the constraint list shows only the constraints related to this component, so you can easily find the distance constraint to edit.