Creating a Product Structure from the Part List of the Assembly
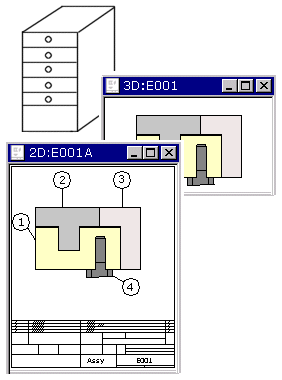
The product structure is created from the parts list of the assembly. This is an alternative way for creating product structure form the assembly. You can save the product structure after finishing the assembly and creating the drawing. The product structure will be transferred to the Product Structure when the assembly parts list is printed.
Please not the following before transferring an assembly to a product structure in the Product Structure:
- The assembly model and its drawing are archived documents.
- The parts in the assembly drawing have part numbers. Subassemblies have only one part number.

- The item data of the first drawing in the assembly is saved in a product structure.
- Archives data of an assembly will contain at least Item label and description. Archives data of the drawing is copied from the model. This data will be collected on the title bar of the drawing and saved in the product structure as item data.
- A part has a drawing, at least a label and a description in archives data, a material code and a description in item data. This data will be collected in the parts list of the drawing and saved in a product structure as the item structure data.
- Components and purchased parts have item data. Non-modeled parts have material data and description as an item data. This data is collected to the parts list and the product structure as the item structure data.
An assembly can contain a subassembly with its own product structure. When printing a parts list of the entire structure (roll-out to end), the sublevel data collected on the parts list will be read from the product structure.
You can save an assembly product structure in the Product Database as follows:
- When the drawing of the assembly is in the working window, select the context-sensitive Parts List.
- In the dialog box, select the output format Parts List to Drawing, for example.
- If you want to print an assembly with it's substructure, select
 Roll out the whole struture.
 - Select
 Move to product database.
 - Confirm printing the parts list. The assembly product structure is opened for viewing and editing.
- Edit and complement the product structure data as follows:
- Item data - When you are transferring a parts list of an assembly to a product database, the item label and description are determined by the item data. If necessary, complement the item data.
- Item Structure Data - The parts of the assembly, not modeled parts is collected in the items structure data.
 If you add data in the item structure data, changes will not be saved in the assembly model.
- Save the data by clicking the OK button.
- If the check box Transfer to Product Database is not available, save the drawing to archives, paste item data, and select the Collect Parts List again.
- View the product structure on the
 tab, and click
  Product Structure.
 - The product structures must not contain a blank item that has minus signs (-) as its code. Blank items will cause errors in the product structures.
- When an assembly model contains subassemblies that have product structures, add only one part number to the subassembly. When collecting the parts list so that also the substructure is presented (roll-out to end), the structure of the subassembly will be printed in the assembly drawing.
