
Elevation Symbols
- On the
 tab, in the Elevation Markings group, click
  Add elevation symbol.
 - Indicate a line whose actual elevation will be retrieved from the 3D model.
- Indicate the position of the elevation text.
- Select Confirm.
Add Elevation Symbol as Specified in Settings
- On the tab, in the Elevation Markings group, click Add elevation symbol.
- Indicate a line whose actual elevation will be retrieved from the 3D model.
Elevation Symbol Settings
- On the tab, in the Elevation Markings group, click
 Elevation symbol settings.
A dialog box is opened in which you can specify the parameters.
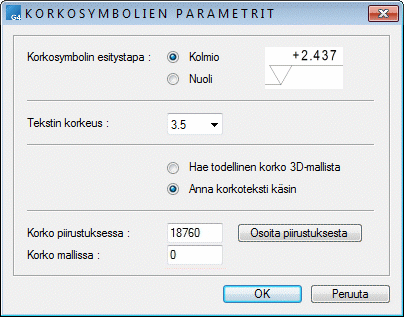
- Do either of the following:
- Select Get Actual Elevation from the 3D Model. Click a line in the drawing.
The software will find the parent element for the line in question from the 3D model, if the parent element has a unique elevation – for example, a horizontal pipe; the elevation in question is used.
If the elevation is not unique. For example, the pipe features a slope; an elevation from the 3D model cannot be defined for the line in question.
- Select
 Type Elevation Text Manually.
 - Set the reference level by selecting Point in Drawing.
- Proposes an elevation that is calculated based on the reference level provided
- Select Get Actual Elevation from the 3D Model. Click a line in the drawing.
- Select OK.
Scaling Elevation Symbols
Scale elevation symbols (macros) using the Kx and Ky factors.
- On the tab, in the Elevation Markings group, click
 Rescale elevation symbols.
 - Enter the scaling factor for the elevation symbols.
- Select Confirm.
Edit Symbol Texts
- On the tab, in the Elevation Markings group, select
 Edit texts inside symbol.
- Click the symbol.
- Enter a new text.
- Select Confirm.