
Add Insulation to a Pipe Line
Piping Design
With the  Insulation function, you can add insulation according to the additional selections, either for the entire pipe line, a specific section or an individual part of the pipe line. You can also add partial insulation to the pipeline starting from the point of the selected pipe and ending at the indicated point of the other selected pipe.
After specifying the target to be insulated, the function opens the Insulation Properties dialog box. Based on the selections made in the dialog box, the program offers an insulation thickness whose dimensioning is based on the standard PSK 3704.
Individual parts of the pipe line will have their own insulation part with item data. The insulations are shown as separate parts in the feature tree.
- On the Piping tab of the ribbon, select the function Insulation. When you start the function through this method, the program automatically selects the entire associated pipe line and opens the Insulation Properties dialog box.
- Select Add - Add pipe line insulations from the context-sensitive menu. When you start the function through this method, the program automatically selects the entire associated pipe line and opens the Insulation Properties dialog box.
Add pipe line insulations and  Add other insulations functions are also available in the context-sensitive menu when nothing is selected.
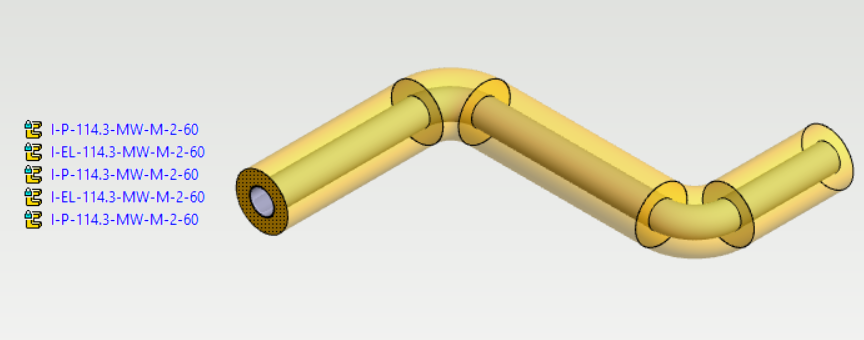
Adding insulation
- On the Assembly tab, select Insulation >
 Add pipe line insulations.
 - The program opens an auxiliary function menu in the upper left corner of the model window.
Options in the auxiliary function menu, starting from the top: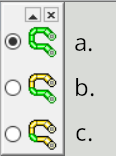
- This will target the entire duct line.
- This will target the section between clicked parts. Click the part from which the section starts and the last part of the section. With the additional option
 Add insulation of pipe only partially, you can display the start and end point between the end points of the selected pipe (partial insulation).
 - Click the individual part to be insulated. With the additional option Add insulation of pipe only partially, you can display the start and end point between the end points of the selected pipe (partial insulation).
- Enter the required values in the Insulation Properties dialog box. Any fields marked in red are mandatory. The program remembers the values while it is running and uses them by default. When the program is restarted, the dialog box fields are empty by default.
- Type. Classification according to standard PSK 3703. The type is only selected for a pipeline, i.e. this option is missing from a duct line.
- Economic thermal insulation (TLE)
- When Economic thermal insulation is selected as the type, the Table field is also activated. The selections in the table affect the calculation of the insulation thickness according to the standard PSK 3704. The alternatives are:
- Basic level
- Good level
- Excellent level
- When Economic thermal insulation is selected as the type, the Table field is also activated. The selections in the table affect the calculation of the insulation thickness according to the standard PSK 3704. The alternatives are:
- Protective insulation (TLE)
- When Protective insulation is selected as the type, the Emissivity field is activated in addition to the Temperature field. Enter the emissivity of the outer surface of the insulation in the field.Note: If the insulation covering is selected later, the emissivity of the covering must be entered in this field.
- When Protective insulation is selected as the type, the Emissivity field is activated in addition to the Temperature field. Enter the emissivity of the outer surface of the insulation in the field.
- Anti-freeze insulation (JE)
- When Anti-freeze insulation is selected as the type, the Time field is also activated. Standard PSK 3704, Table 7 defines how the insulation thickness is defined in this case.
- The fields Temperature and Table are not used in the case of Anti-freeze insulation.
- Process technical thermal insulation (PLE)
- Economical cold insulation (TKE)
- Anti-condensation insulation (HE)
- Process technical cold insulation (PKE), standard PSK 3712
- Economic thermal insulation (TLE)
- Temperature. Select a temperature by using the arrow on the right side of the field or enter a value in the field itself.
- DN size. Pipe nominal size. The program gets this information directly from the indicated pipe.
- Material. With the button
 you get a list of insulating materials according to standard PSK 3705. Material abbreviations, product type and category are completed according to the selection made.
 - Product type, Class. Automatically set according to the selected insulating material.
- Thickness (mm). Based on the choices made above, the program calculates and proposes the insulation thickness according to the standard PSK 3704. You can also enter the thickness yourself if desired.Note: When the DN size of the pipe to be insulated cannot be found in the insulation standard database, the closest but larger size is used. For example, if you are insulating a pipe of DN 102 size, you will see the insulation thickness in the chart at DN 125 instead of DN 100.
- Covering. If desired, you can select a covering for the insulation. At the same time, you can choose whether to make a separate item of the covering for the part lists.
- The material and thickness of the covering. With the button you get a list of covering materials according to standard PSK 3706. The thickness of the selected covering is automatically filled.
- Insulation or covering Color

 .
.You can choose a color separately for the insulation and covering. For more information, see Color of Insulation and Covering.
- Tracing. You can define tracing to be added inside the insulation. The tracing is taken into account in the isometric drawing as a dot-dash line. You can also enter a tracing label, which will be used as additional information for lists
- The option Transparent in assembly drawing makes the insulation transparent in the drawings. Only the outer edge of the insulation will be drawn with a thin dotted line.
- Type. Classification according to standard PSK 3703. The type is only selected for a pipeline, i.e. this option is missing from a duct line.
- Select OK.