
The Door or Window Accessories Dialog Box
Select the window or door accessories in the dialog box. When you have selected more than one object to be edited, select or clear the checkbox for the accessory in the dialog box. The modification will apply to all the selected objects. Other accessories of each object will remain unchanged.
If the DesignStream Interface add-on option is available to you, the accessory options are read from the DesignStream system and their selection is more limited. The remainder of the accessories should be selected in the DesignStream system. The function requires that the Quantity Surveying add-on option is enabled in the DesignStream system. The function requires that you are logged in the DesignStream system when the accessory options are loaded for the first time. After this, the program will remember the options and the log-in is not required.
- Door or Window Accessories
- The page displays the accessories and properties that are available for the selected object (window, interior door, exterior door).
- Accessories are enabled by selecting the checkbox
 . If necessary, you can select the type of accessory from the list.
 - Accessories are disabled by clearing the checkbox
 .
. - If the selected objects have different accessories, the checkbox will display the option
 . If you select or clear the checkbox, the property will affect all of the selected objects.
 - Pane Accessories
- The page displays the accessories available for the glass opening of the selected object. You can select glass opening specific accessories, when you select Modeling | Wall Layout |
 Window Grilles and Accessories, while the model window is active.
 - Window grilles (2)
If you wish to add only one window grille to the pane, select the first Window grilles check box. If you wish to add two window grilles to the same pane (for example own grilles for the bottom and top of the pane), select both the check boxes, and select a grille of its own for both from the browser.
Click the Select button and select a grille in the browser. Open the desired folder and double-click a thumbnail to select a window grille.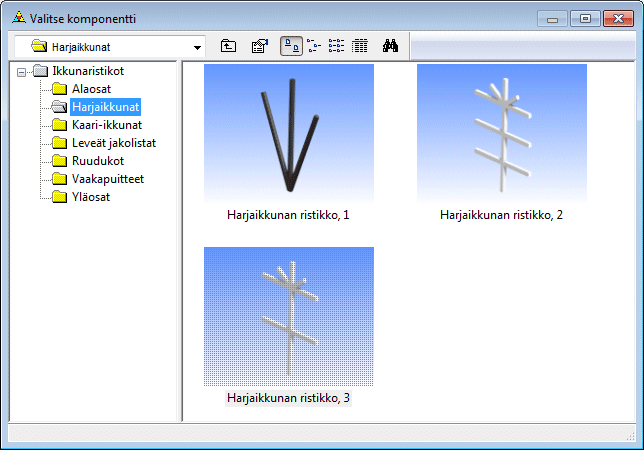
The window grilles included in the basic software delivery are saved in the component library win_grille.
- Opening direction
You can define the opening direction by selecting the Graphics checkbox. Click the Select button and double-click a thumbnail to select the opening direction.
The opening direction will be displayed as a symbol in the window sheet.
If necessary, you can also display the opening direction symbols in the elevations and cross sections by editing the drawing generation model settings. Include Window Pane Graphics in the drawing generation model.
Edit the Drawing Generation Model Settings
The window opening direction symbols included in the basic software delivery are saved in the component library win_graphics.Note:- The window label may include a "handedness" denotation such as R = right or L = left. Before adding an opening direction to a window, make sure the direction does not contradict the window denotation.
- Mirroring a window also mirrors the opening direction.
- Window grilles (2)