
Library Features
The features in the feature library can be used to model several different models. The most common features that are used to model parts or sheet-metal parts can be saved in the feature library. Using a library feature will speed up the work and decrease the number of errors.
For example, you can model a wedge feature, save it in the feature library, and use the library feature to model a part as either a Cutout or Boss feature.
Add an Existing Library Feature to a Part
Add a Cutout library feature to a part. In the model window, select the context-sensitive function Library Feature >  Cutout.... Select the library feature from the image menu and move it onto the face. If necessary, edit the feature using the dimension table values. The library feature will automatically be set perpendicular to the face.
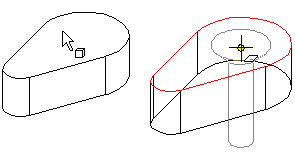
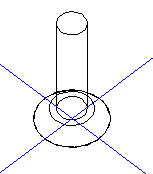
Select a position for the feature by clicking, then fix the feature to the edge of the face (arc) by determining the Concentric constraint in the sketching. If necessary, you can draw a reference line in the sketching mode to help position the library feature. After accepting the sketch, the feature will remove material from the part.
 Add a Library Feature to a Model
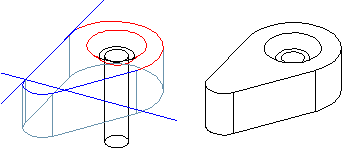
Model a part using library features
Start modeling a new part using a boss feature. Select the context-sensitive function Library Feature >  Boss.... The software supplier's library features can be found in the Standard directory from which you can select the desired shape, for example, a ball or cylinder from the Basic Shape directory.
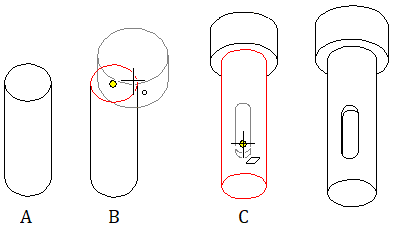
Start modeling a new part using a boss library feature (A). Add another boss library feature to the part (B). Finally, add a cutout library feature (C). You have now roughly shaped the part using library features.
Add copies of a library feature
Add all similar features to one surface at once by copying. You can locate the copies to their positions like the original feature. If you change the feature, also its copies change. If you mirror the feature, also its copies mirror.
Add copies as follows:
- Add a library feature to a part or edit the sketch of an existing library feature.
- In sketch mode, select the context-sensitive function
 Add Feature Copy.
 - Select the location of the copy in the sketch.
- Select positions for more copies, if you wish.
- Finish adding copies with the context-sensitive function
 Cancel or by pressing the middle mouse button.
Create the Feature Library
The feature library has existing feature examples that have been divided into various directories. You can create new directories when saving features. In the library, you can save sketches that you frequently use to model parts or sheet-metal parts.
Model a New Library Feature
A library feature can consist of features based on a sketch and features used to edit parts. Create a new model. Save it as a part. Reserve a model number in the archive. Start modeling the part by sketching the geometry.
Please note that the origin of the part's first sketch will become the handle of the finished library feature when you save the part. If the point is not suitable for use as the handle of the library feature, you can define a new handle after the part has been finished but before it has been saved as a feature.
The first sketch of this part is a circle that is extruded conically. The Z axis of the origin of the sketch points inside the part, in the opposite direction of what is needed. The origin is not suitable to be the handle of this library feature. A new handle is selected for the part before it is saved as a library feature.
The editing of a library feature is possible by defining its geometric properties, such as a dimension in a sketch or the length of an extrusion, as variables. When selecting a feature from the library, you can edit the feature using the values in the dimension table before adding the feature.
Save a New Feature in the Library
After finishing the part, save it in the library as a feature. You can save a feature in the library, if your software has been enhanced with the Library add-on option. You can save the part using the context-sensitive function  Save To Library > As Feature.... The Windows Save As dialog box will open. If necessary, create a new folder. Select the directory and enter a name for the feature file.
The geometry and image file of the feature will be saved in the feature library.
When you want to use the library feature, select the context-sensitive function Library Feature after selecting the part. Select the boss or cutout function from the feature library. Archive Browser
When you select a directory, the library features in it will be displayed as thumbnails in the browser. Select the feature by double-clicking the icon.
A library feature's geometry will be saved in a model file (extension .vxm) and image in an image file (extension .bmp). If you wish to edit a feature later, open the model from the feature directory, make the necessary changes and save the model again with the same name.