
Duct Line Routing – Determining Duct Dimensions
Piping Design
When adding a duct with free dimensions, the duct dimensions are controlled with the database display.
Note:
- The items created by the function are temporary items, which will not be saved in the pipe database.
- During the function, you can no longer switch to using actual items that can be found in the pipe database/Flow.
- When continuing an existing duct, the adaptiveness functions through the same database display, if the existing line differs in size from the selected temporary item. As regards ducts that are added with free dimensions, the pipe size can be changed through the same database display.
- The straight or elbow component can be a pipe component that features a corresponding part model as the first part to control the other parts. This part model cannot have item data and the assembly cannot include other pipe parts.
Add Duct Line
- On the
 tab, in the Ducts group, select
  Add Free-Scale Duct Line.
A dialog box is opened where you can define the duct dimensions.
- Select the dimensions in the dialog box.
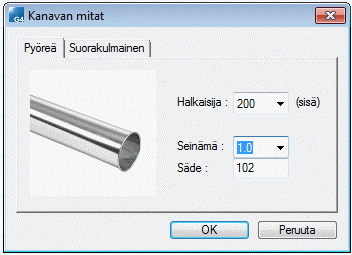
- Circular tab. Determine the dimensions of the round duct in the dialog box. Diameter (inner), wall and radius. Select OK.
The dimensions provided in the dialog box will be displayed as the duct properties. You can see the selected properties on the
 tab in the Properties group.
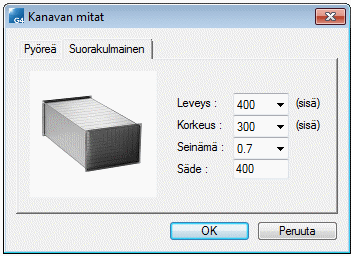
 - Rectangular tab. Determine the dimensions of the rectangular duct in the dialog box. Width (inner), height (inner), wall and radius. Select OK.
- Circular tab. Determine the dimensions of the round duct in the dialog box. Diameter (inner), wall and radius. Select OK.
- Select OK.
- Begin the routing.
- Select Confirm.