
End a Pipe Line
Piping Design
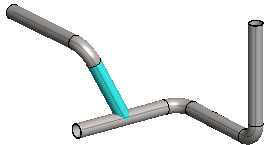
As an example, ending a pipe line
A pipeline can end at the following:
- The end of the pipe
- A pipe component
- A branch component
- A set-on
- See also Automatic Routing.
Ending at the End of the Pipe
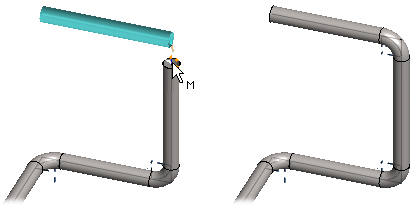
With adding a pipe line selected, do as follows:
- Select either of the following:
- Continuous pipe. End the pipe line as a continuous.

- Jointed pipe. End the pipe line as a jointed.

- Continuous pipe. End the pipe line as a continuous.
- Move the cursor near the handle of the pipe. The cursor snaps to the grip point. Select the grip point.
- Click a point.
Ending with a Pipe Component
In some cases, you cannot end the pipeline until you have added the counterpart component.
Ending with a pipe component can be done if the pipeline is perpendicular to the component.
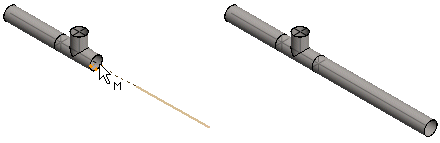
With adding a pipe line selected, do as follows:
- Move the cursor near the end point of the pipe's centerline. The cursor snaps to the grip point.
- Click a point.
Ending with a Pipe Component - the Diameter Differs from the Diameter of the Pipe to be Routed
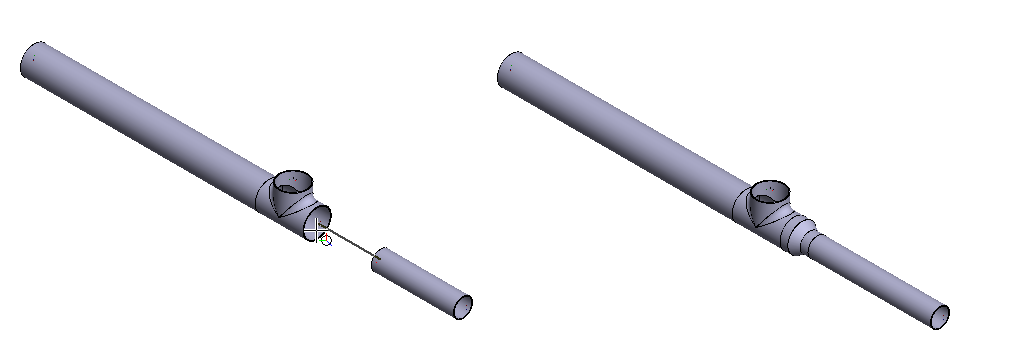
When the pipeline drawing is ended to a grip whose diameter differs from the diameter of the pipe to be routed, taking into account the tolerance, the program automatically moves to the addition of the cone component.
If the previous routing point is on the same segment as the selected end point, the program offers only concentric cones to choose from. Otherwise, there are both concentric and eccentric cones to choose from.
After selecting and adding the component, the program returns to routing. The step can be canceled if necessary, just like the other steps of the pipeline addition. The operating logic of the step is thus entirely the same as in the automatic addition of a counter flange or a branch component.
- Move the cursor near the end point of the pipe's centerline. The cursor snaps to the grip point.
- Click a point.
- Select a reducer or expander cone provided by the program.
- Confirm the function.
- Automatic reducing or expanding is not selected when starting pipeline routing.
- If a reducer or expander cone corresponding to the diameter of the pipe to be routed is not found, the program gives error messages.
- The automatic addition of the cone component is used when adding pipelines and duct lines.
Ending with a Branch Component
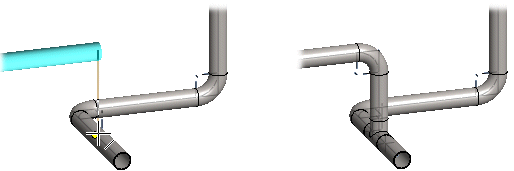
With adding a pipe line selected, do as follows:
- Move the cursor near the pipe's centerline. The cursor snaps to the center line.
- Click a point on the pipe's center line.
- Select the T branch from the library.
- Select Confirm.
Ending with a Set-on
With adding a pipe line selected, do as follows:
- Select the function:

- Move the cursor over the pipe.
- Click a point on the pipe's center line.
- You can also set the component on using the Alt key. With adding a pipe line selected, do as follows:
- Press the Alt key.
- Move the cursor over the pipe.
- Click a point on the pipe's center line.
- Release the Alt key.