
Add a Hose by Clicking the Route
Piping Design
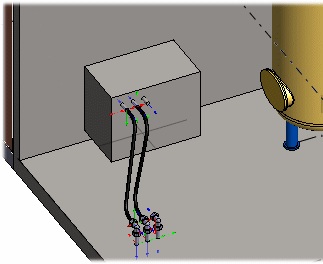
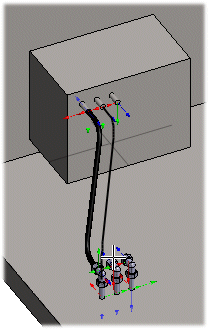
You can add a hose by clicking the starting point, intermediate points in the assembly geometry, and the end point.
- Do either of the following:
- On the
 tab, in the Add group, select
  Add Pipe Component.
 - Select the context-sensitive function
 Add> Pipe Component.
- On the
- For example, in the Browser folder Hose, and select hose.
- Select, for example, a handle as the starting point.
 The start or end point can be a handle or a pipe or connector end without a handle. If you select one of these as the start point, the hose will be automatically made tangential to the end point.
- If necessary, indicate intermediate points. You can indicate geometry points from the assembly model as intermediate points for the hose. Later, add the Coincident constraints of the assembly to the points indicated as intermediate points.
- Select, for example, a connector handle as the end point. The hose will be automatically tangential to the end point.
- Later, add the Coincident constraints of the assembly to the points indicated as intermediate points.
The hose takes into account the specified minimum radius and the length of the end line. By default, the values are read from the pipe database (parameters: radius and length min.).
Note:
- If you copy or attach a hose from the clipboard, add it by indicating the route.