
Pipes to Panel Drawing
To display a pipe in the panel drawing, you can connect it to a panel.
Connecting an object does not affect the panel but it does require you to update the panel drawing. If the panel drawing already exists, the program prompts you to update the drawing when you open it.
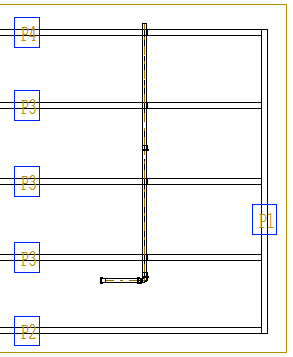
The pipes are connected to the panel as a separate layer. The sequence number of the layer is 97. You can show the pipes in the panel drawing view when you select the 3D presentation method for the layer parts in the view properties.
Connect the Pipes to the Panel
- Do one of the following:
- Select an individual panel.
- Press and hold the Ctrl key or use area selection to select several panels.
- Select Panel |
 Part Visibility >
  Attach Pipes.
The pipes that have previously been connected to the panel are highlighted in color.
- Select the pipe to be connected. Click several pipes by holding down the Ctrl key. If you wish to detach a previously connected pipe, press and hold the Ctrl key and select the pipe to be detached.
- Select Confirm.
Show the Pipes in the Panel Drawing View
- Open the panel drawing or truss drawing.
- Select a View
- Right-click to open the context-sensitive menu.
- Select
 Properties.
 - In Filter, select Layer filter and click Settings.
- Select the properties for the layer “97 Pipes”:
- Parts - Select 3D.
- Label - Select ON (show labels) or OFF (hide labels).
- Confirm by clicking OK.
Note: You can also add a schedule of the pipe parts to the panel drawing. Add a view to the panel drawing, select the view type Schedule, and select the desired option from the list.