Contact Label
You can select the text properties to the contact label to be added. You can type the label or select the label from the list.
Before selecting a position of the label, you can change the location point or set the label in the direction of an angle.
- Add a contact label as follows:
- On the
 tab, in the
Labels group, click
tab, in the
Labels group, click  Contact Label.
- On the
- Select a connection point.
- Select text properties of the contact label. If necessary, select auxiliary functions.
- Move the cursor on top of the symbol, and the IO points are shown.
- Select the connection point for the contact label.
If the
 Automatic search option is selected, select the first
serial number connection label point first.
Automatic search option is selected, select the first
serial number connection label point first. - Select the label from the list, or type the label in the dialog box, and confirm the data.
- If necessary, change the location point of the label or set the label in the direction of an angle.
- Select a location for the label.
- Select Confirm.

 Note
Note
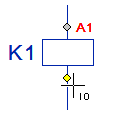
- In insertion of a contact label, cursor locates itself to the connection point of the
symbol. The point is marked with grey color when you move the cursor near to the symbol. If
you move the cursor near to the handle, its color turns yellow, and you can click the point.