
Oblique Section
You can create an oblique section of a model drawing from multiple viewing directions. The finished section view is presented according to the viewing direction that was defined first.
- On the
 tab, in the Tools group, select Projection, and select
  Cut.
Cut. - Create an oblique section of the projection by clicking the following button:

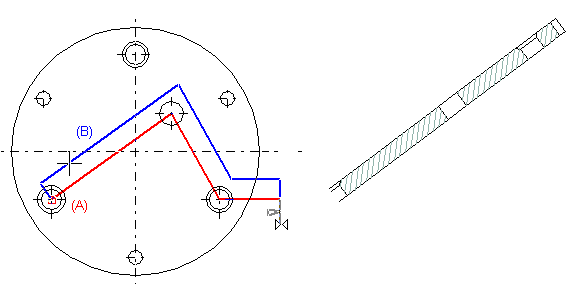
- Point the start point of the section line (A).
- Point the following points.
- Select Confirm.
- Move the cursor and specify the section depth in the projection (B).
- Define the projection settings.
 Projection Settings dialog box
 - Point a position for the oblique section in the drawing.
- Select Confirm.
 Select a projection from the drawing, and then select the context-sensitive function Section view.
Move the cursor over a projection symbol in the projection tree, and then select the context-sensitive function Section view.