
Add an Additional Area Material
Architectural, Framer
You can add an additional material tied to an area limited by a closed polyline to a building. You can add the material to both the floor plan drawing and the model. The available additional materials are defined in a library.
Add the material by selecting the points of the line limiting the area. The program will form a closed polyline by adding a line from the point last selected to the start point. You can add a rectangular area easily by selecting two points: the start and end point of the rectangle diagonal.
The visible geometry of the additional material is a closed polyline both on the floor plan drawing and the model. The properties of the line have been defined in the additional material library. Additional materials are not displayed in the elevation drawings.
When you click the points of the line in a drawing, you can first define a height position for each of the points. If you do not define the height position, the points will be positioned in the model with Z coordinate = 0.
- Select Modeling | Zone |
 Material
  Additional Area
Material.
Additional Area
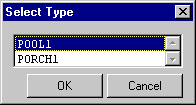
Material. - Select the material from a list, for example:
- If you select the points in the drawing, select the function
 from the auxiliary menu, if necessary,
and enter the height position of the point. The height position is valid until you define a
new value for it.
from the auxiliary menu, if necessary,
and enter the height position of the point. The height position is valid until you define a
new value for it.
- Select a point of the line limiting the area.
- Repeat steps 3-4.
- Select Confirm.
