Create a Wall from a Line
You can create a wall from a polyline or an arc drawn in the drawing or in the model. The wall type, wall structure, positioning height, reference line, configuration, visibility etc., is defined in the same way as when adding a wall. You can form a single wall from an arc, or you can divide the arc into sectors, each of which forms one wall.
- Select a line.
- Right-click to open the context-sensitive menu.
- Select
 Build Wall from Line.
 - Select the wall in a dialog box.
If you have used the adding function before, the previously selected wall is now the default wall. You can check which wall is selected from the status bar. You can change the wall by first selecting the
 Select Another Wall function from the auxiliary menu.
 - If necessary, change the locating height of the wall or the reference line, or select another function from the auxiliary menu.
- You can also select the wall's presentation method from the auxiliary menu. The coarse/accurate presentation method is especially important when adding a log wall. By default, the presentation method of a log wall is coarse. Individual logs are modeled in the accurate presentation method, but this also increases the size of the model and slows down its handling.
- Click the line outside the wall to be created.Note: Click the line twice. The first click removes the line selection and the green color. The second time, click the line from outside the wall you are forming. The program will again highlight the line with a green color.
- Select Confirm.
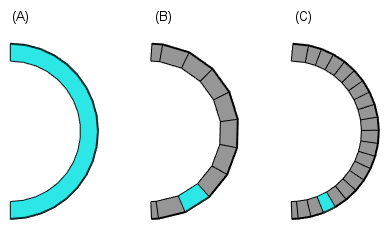
- If the line you clicked is an arc, you will be prompted: Convert arc to line sectors? Select either of the following:
- No - A single wall is formed from the arc (A).
- Yes - The arc is divided into sectors, each of which forms a wall (B, C). Type the number of the sectors in the text box.