
Save a Truss to the Library
After you have modeled a truss, you can save it to the truss library. You can only save trusses to a customer-specific library. First create the library, see Create a New Library.
- Activate the model window where the truss is.
- Select the truss volume you have modeled the parts to.
- Do either of the following:
- Select Truss | Parts |
 Generate
Parts.
Generate
Parts. - Right-click to open the context-sensitive menu, and select
 Generate
Parts.
Generate
Parts.
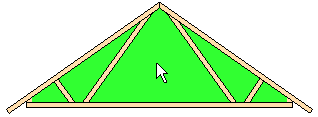
The Truss Structure dialog box opens. The parts of the modeled truss are displayed in the preview window.
- Select Truss | Parts |
- Select a customer-specific library from the Libraries list. The Save to library button is activated.
- Click Save to library. The Truss library dialog box opens.
- Define the library data of the truss in the dialog box.
If a truss exists with the same name, you will be prompted: Replace it? Select either of the following:
- Yes - The truss will replace the old truss with the same name.
- No - You can rename the truss in the Truss Library dialog box.
- Confirm by clicking OK.
