Ellipse Arc (2D)
General
- Add an open ellipse by clicking a center point, two radius points that define the shape and size of the ellipse, and the start and end point of the ellipse's arc.
- Auxiliary functions
 cannot be used when adding an ellipse, although you can open a line-typical auxiliary menu.
 - If you want to draw the arc of a horizontal or vertical ellipse, use cursor locking in the direction of the X and Y axes when clicking the radius points that determine the direction and size of the main axes.
- If you want to draw the arc of a fixed ellipse in an oblique position, it is best to first draw auxiliary lines at right angles from the center points of the ellipse in the direction of its main axes to the length of the radius.
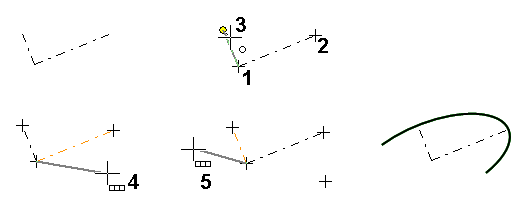
- The arc of an ellipse can be easier to draw if you first draw the ellipse and then cut it, for example, by using auxiliary lines and the
 Delete Section function.
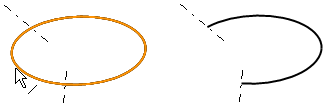
Add an ellipse arc
- Select Drafting | Lines |
 Line >
  Ellipse Arc.
 - Select the line properties, if necessary.
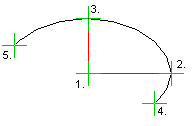
- Click the center point (1).
- Click the first radius point (2).
- This radius point does not define the direction of the first main axis of the ellipse arc.
- Click the second radius point (3) that defines the shape of the ellipse.
- The order in which these two radius points are clicked also determines the direction of the ellipse arc.
- Click the starting point (4) of the open ellipse.
- Click the end point (5) of the open ellipse.
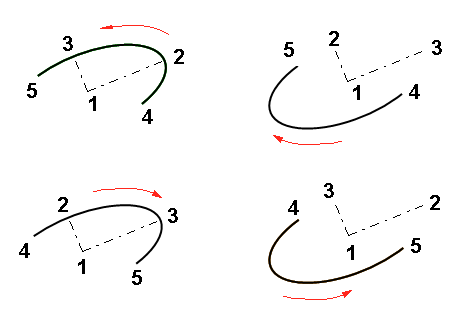
- The ellipse will be drawn counter-clockwise between the starting and end points when you click the radius points counter-clockwise.
Examples of point clicking order
- Center point.
- First radius point.
- Second radius point (defines the direction of the arc).
- Start point of the ellipse arc.
- End point of the ellipse arc.