
Move a Panel with the Snap Grips
Framer
When editing stacks in the model window, you can move a panel in the same stack or to another stack, and use the snap grips to select the position. First, select the panel you want to move and select a snap grip from it. Then select the second panel and its snap grip. The first panel moves so that the snap grips connect.
In the example below, panel U22 of stack 2 is moved to stack 1 as the second lowest, above panel U24.
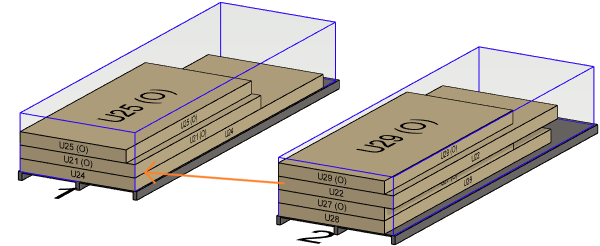
- Select the panel U22 to be moved.
- Click the lower snap grip on one of the edges.
- Select the panel U24 from the second stack, above which the first panel will be moved.
- Click the upper snap grip on the corresponding edge from this panel.
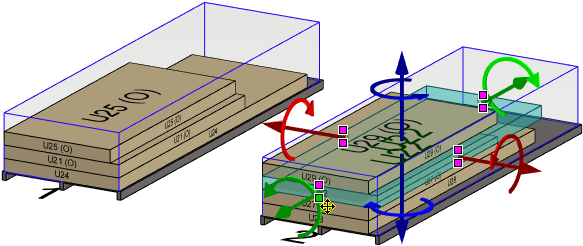
The grips connect and the panel U22 moves above the panel U24. In stack 1, the panels above the moved panel are also moved, but in stack 2, an empty gap remains at the moved panel.

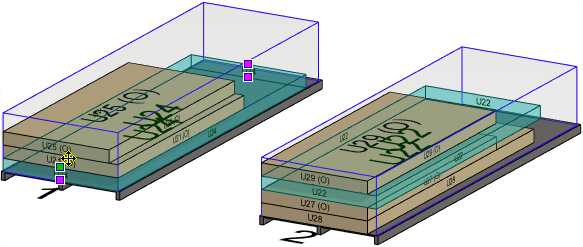
- Right-click to open the context-sensitive menu.
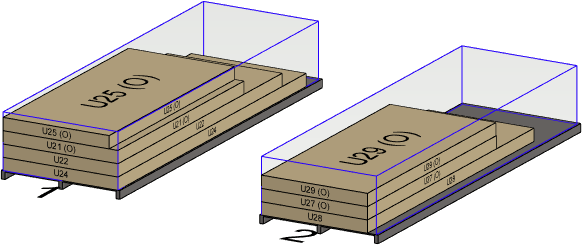
- Select Tidy stacks. Stack 2 is updated.
Note: If Update items after moving is selected in the stack settings, the change is automatically updated to the stack data. When the property is not selected and you move a panel from one stack to another, the change must be updated to the stack data using the context-sensitive menu function Update stacks. The model tree shows the panels belonging to stack.

Note: If Dimensions based on content is selected in the stack properties, the stack outlines are green in the model window. You can update stack dimensions with the context-sensitive menu function Update size if you move or delete panels from the stack.