
Add a Single Trim
Architectural
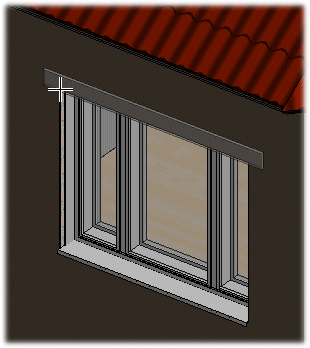
You can add a single trim to an opening from the trim library. The available trims are customer-specific.
- Select the opening.
- Select Window or Door | Trims |
 Opening Trim Piece.
 - Select the trim in a dialog box.
- If necessary, you can change the presentation method or visibility of the opening trim with the auxiliary functions.
- Move the cursor close to the edge of the opening. The opening trim will be locked to the wall surface. The program will automatically select the length of that edge as the nominal length of the trim. The default reference point of the trim is located on its back surface, at the point that is positioned at the corner point of the opening.
 The position of the opening trim depends on the selected type: for example, bottom section – horizontal opening trim, or side section – vertical opening trim.
 - Once the cursor is locked to the wall surface, position the opening trim by clicking the left mouse button.

Note: Once you have added an opening trim, you can move its end by the grip point.
Note: You can edit the shape of the end of the trim by using the Move End of Opening Trim function.