
Selecting Height When Adding an Opening
This function can be used to change the default locating height of a window or door. You can choose whether to define the locating height based on the top or the bottom edge of the opening. Specify the new locating height in the Enter Locating Height dialog box.
- Do either of the following:
- Enter the locating height in the text field of the dialog box.
- Click the Select button and specify the locating height by
clicking a point in the model. The model, cut by a plane, is positioned in a front view
projection. You can change the view by using the arrow keys:
- Move the cutting plane with the Up and Down arrow keys.
- You can change the viewing direction with the Right and Left arrow keys.
You can return to the dialog box without clicking a point by pressing the Esc key.
- Select the base height relative to which the locating height is defined:
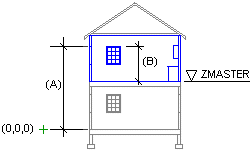
- Global Height - The locating height is defined in relation to the global zero level (A).
- Relative Height on Current Floor - The locating height is defined in relation to the active floor's base height (B).
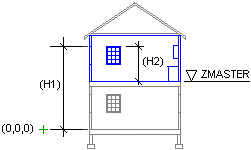
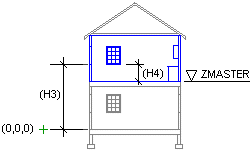
- You also need to choose whether to define the height of the header or the sill. Select
either of the following:
- Header height (H1 or H2)
- Sill height (H3 or H4)
- Confirm by clicking OK.