
Add a Profile to a Framing
Framer, Floor Framing & Rafters
Add a profile selected from the profile library whose length and direction are determined by the start and end point selected. The parameters of a profile added to a framing are different from a beam added as a regular profile: you do not enter a vertical position for it, but its position is tied to the top or bottom surface of the framing.
- Select the structure. The structure’s basic layer whose type is FRAMING becomes automatically selected. If necessary, you can select another FRAMING type layer.
- Select Plane Structure | Framing |
 Add Profile.
 - Select the profile properties.
- Select one of the following from the Location list in the dialog box:
- Dropped
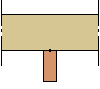
- Flushed Bottom
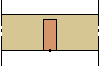
- Flushed Top
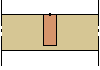
- Dropped
- Select one of the following as the locating point for the cross section:
 Beam Right
Side
Beam Right
Side Beam
Middle
Beam
Middle Beam Left
Side
Beam Left
Side
- Select the parameters by using the
 Parameters function.
 - Select the start point of the profile.
- Select the end point of the profile.
