Selecting Corner Details
Framer
You can use this function to select a detail for a corner where more than two walls are joined. This function will be modified customer-specifically. If you have the customization in use, the function opens the corner detail alternatives in a drawing window.
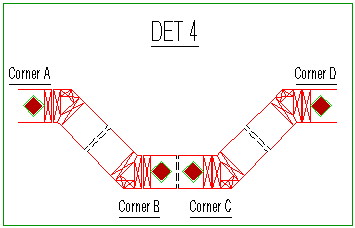
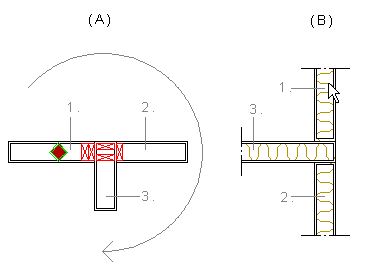
Select the detail in the drawing window by clicking its hot spot. In the detail, the walls connecting in the corner have been numbered so that the wall with the hot spot is wall number 1, a so called reference wall. You will click a wall corresponding the reference wall in the floor plan, when you select the corner to which the detail will be applied. The numbers of the other walls are determined by going around the corner in clock-wise direction. Each wall has its own detail defining the way the wall is connected to the corner. The example figure A below displays the selected corner detail. Figure B displays the order in which the wall details are applied when the wall marked with an arrow is selected as the reference wall.
- Select Classic Wall Framing | Wall Panelizing |
 Special Framing
 Select Corner
Details.
Select Corner
Details. - Select the detail by clicking its hot spot.
 The wall with the hot spot is the
reference wall of the detail.
The wall with the hot spot is the
reference wall of the detail.When you have selected the detail, the drawing window is closed.
- Click the reference wall near the corner in the floor plan drawing.
The program adds the detail to each wall, and adds the detail label in the floor plan.
 Note
Note
- Create the panel breaks before adding the details.
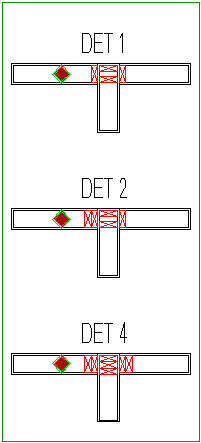
Example
Examples of corner detail alternatives: