
Add a Library Feature to a Sheet-Metal Part
Sheet-Metal Design
The software supplier's library features can be found in the Browser.
Note: The library features are suitable only for thin sheet-metal parts.
- Open the Browser. Open from the Archives or from a Library
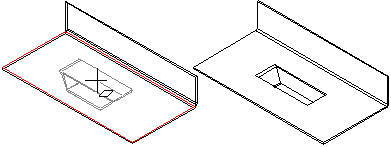
- Select . The library contains punching features, forming features and finished box features and ducts.
- Select the library feature in the browser.
- Select a function based on whether you want add or remove material. Select the context-sensitive function
 Library Feature > Boss... or Library Feature >
  Cutout....
 - Edit the feature geometry using the values in the dimension table, and select OK.
- Position the library feature. If necessary, you can use sketch constraints to position the feature.
- Select
 OK.
OK.
Note: You can edit the library feature of a sheet-metal part using the dimension table values by first selecting the face formed by the feature on the part, and then selecting the Edit Operation function. A fast way is to double-click a face formed by the feature in the model, or double-click the symbol in the feature tree of the part.