
Parameters for a Roof With a Rafter Structure
The roof parameter database contains predefined parameter sets. You can move from one row to another in the database using the cursor keys.
- User Guide
- This function opens a drawing that depicts the parameters of a roof with a truss structure. You can close the window in one of the following ways:
- Parameter Set Name
- A description text for the structure.
- Material Code
- You can select the roof material from the list.
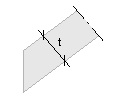
- Pitch
- The pitch is typed in a text window either as a ratio or in degrees. The ratio can be typed either as the ratio of the height and width of the slope or as a decimal number, for example 1/4 or 0.25. If the pitch is typed in degrees, the numeric value is followed by the letter A, for example 45A.
- Rafter size
- Type the size of the top chord of the truss in the text field.
- Eave Type, Fascia Height
- You can create different eaves by changing the parameters Eave type and Fascia height:
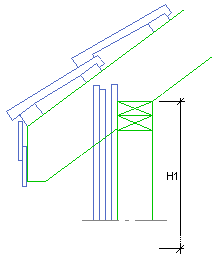
- Plate Height
- Plate height can be loaded from the drawing or the model of a building with the Get button. The window (drawing or model window) in which you the wall is to be clicked can be selected in a message box, after which the wall is clicked in the selected window. In a 2D drawing window, only a wall that has been added to the drawing-model pair can be selected. The walls of a reference drawing cannot be selected.
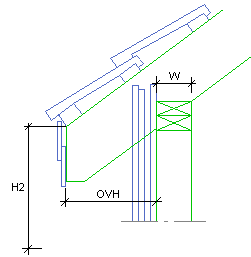
- Eave height, Overhang, Seat cut
- Values must be selected for two of these parameters, after which the third can be calculated by clicking the Calculate button. The most common alternative is to type values for the Overhang and Seat cut parameters, in which case the Eave height parameter is calculated. When adding a roof based on an eave line added earlier, the Overhang value that was applied when adding the eave line must be used.
- Set roof on walls
- The Set roof on walls button can be used when a roof is placed on top of log walls. When this function is used, the shape of the log's cross section is taken into consideration when calculating the eave height. The value of the Seat cut parameter should then be 0. If a different value is given for the parameter, the shape of the cross section is not taken into consideration. The plate height is defined by selecting a wall on top of which the eave of the roof will be set in the drawing or the model window of the project. You can then either
- Log wall clipping offset from roof bottom
- The parameter defines how the logs of a gable wall are cut with the roof.
 Setting a Roof on Top of a Log
Wall
Setting a Roof on Top of a Log
Wall